Overview
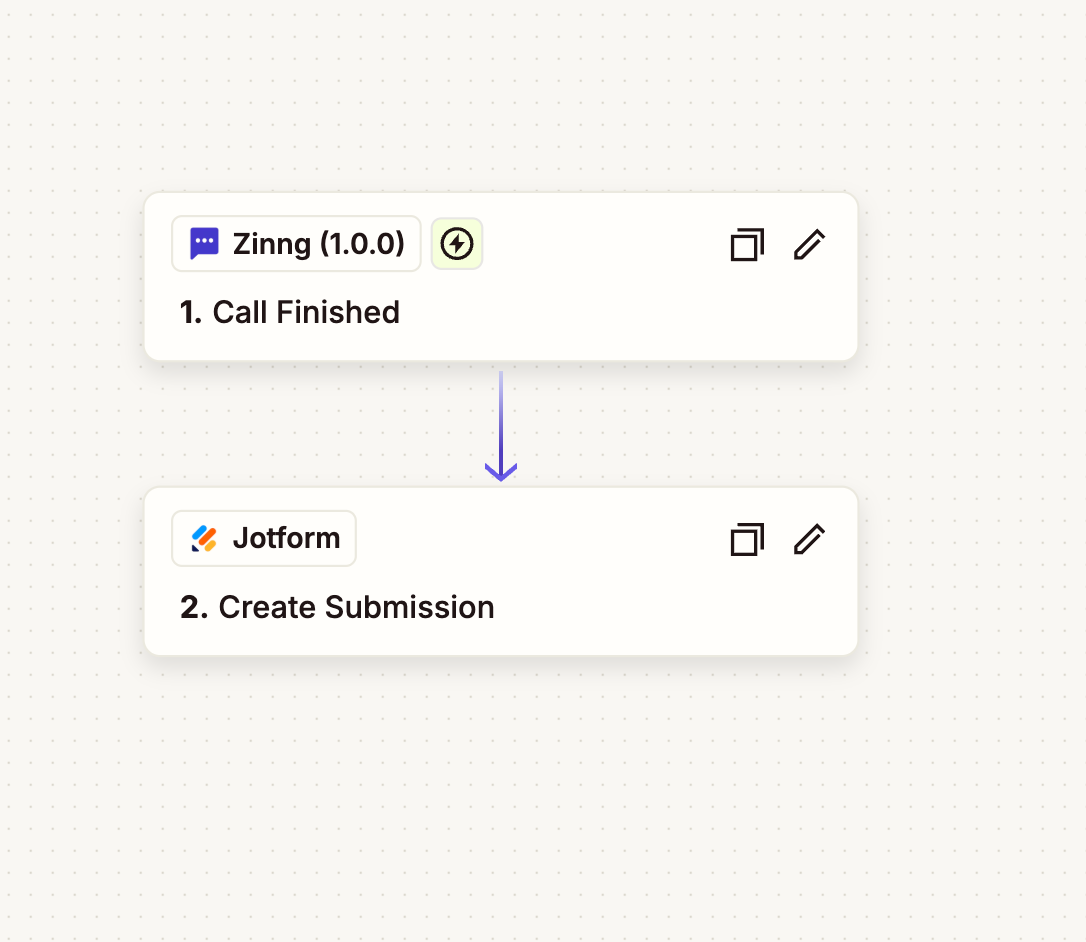
This guide walks you through connecting your Zinng AI phone agent to Jotform so that every completed call automatically creates a new Jotform submission with the caller's details. It works through Zinng's Zapier "Call Finished" trigger, so there is no code involved. The whole flow is two steps in Zapier: Zinng's "Call Finished" trigger, followed by Jotform's "Create Submission" action.
What you'll need
- A Zinng account with at least one AI phone agent set up
- A Jotform account with the form you want submissions created in
- A Zapier account (the free plan is enough to get started)
1. Request access to the Zapier integration
To use Zinng's Zapier integration today, you first need to be granted access. Reach out to Zinng support, either through the chat widget on our website or by emailing [email protected], and let us know the email address you want to use for your Zapier account. We'll add that email as an invitee to the Zinng app on Zapier.
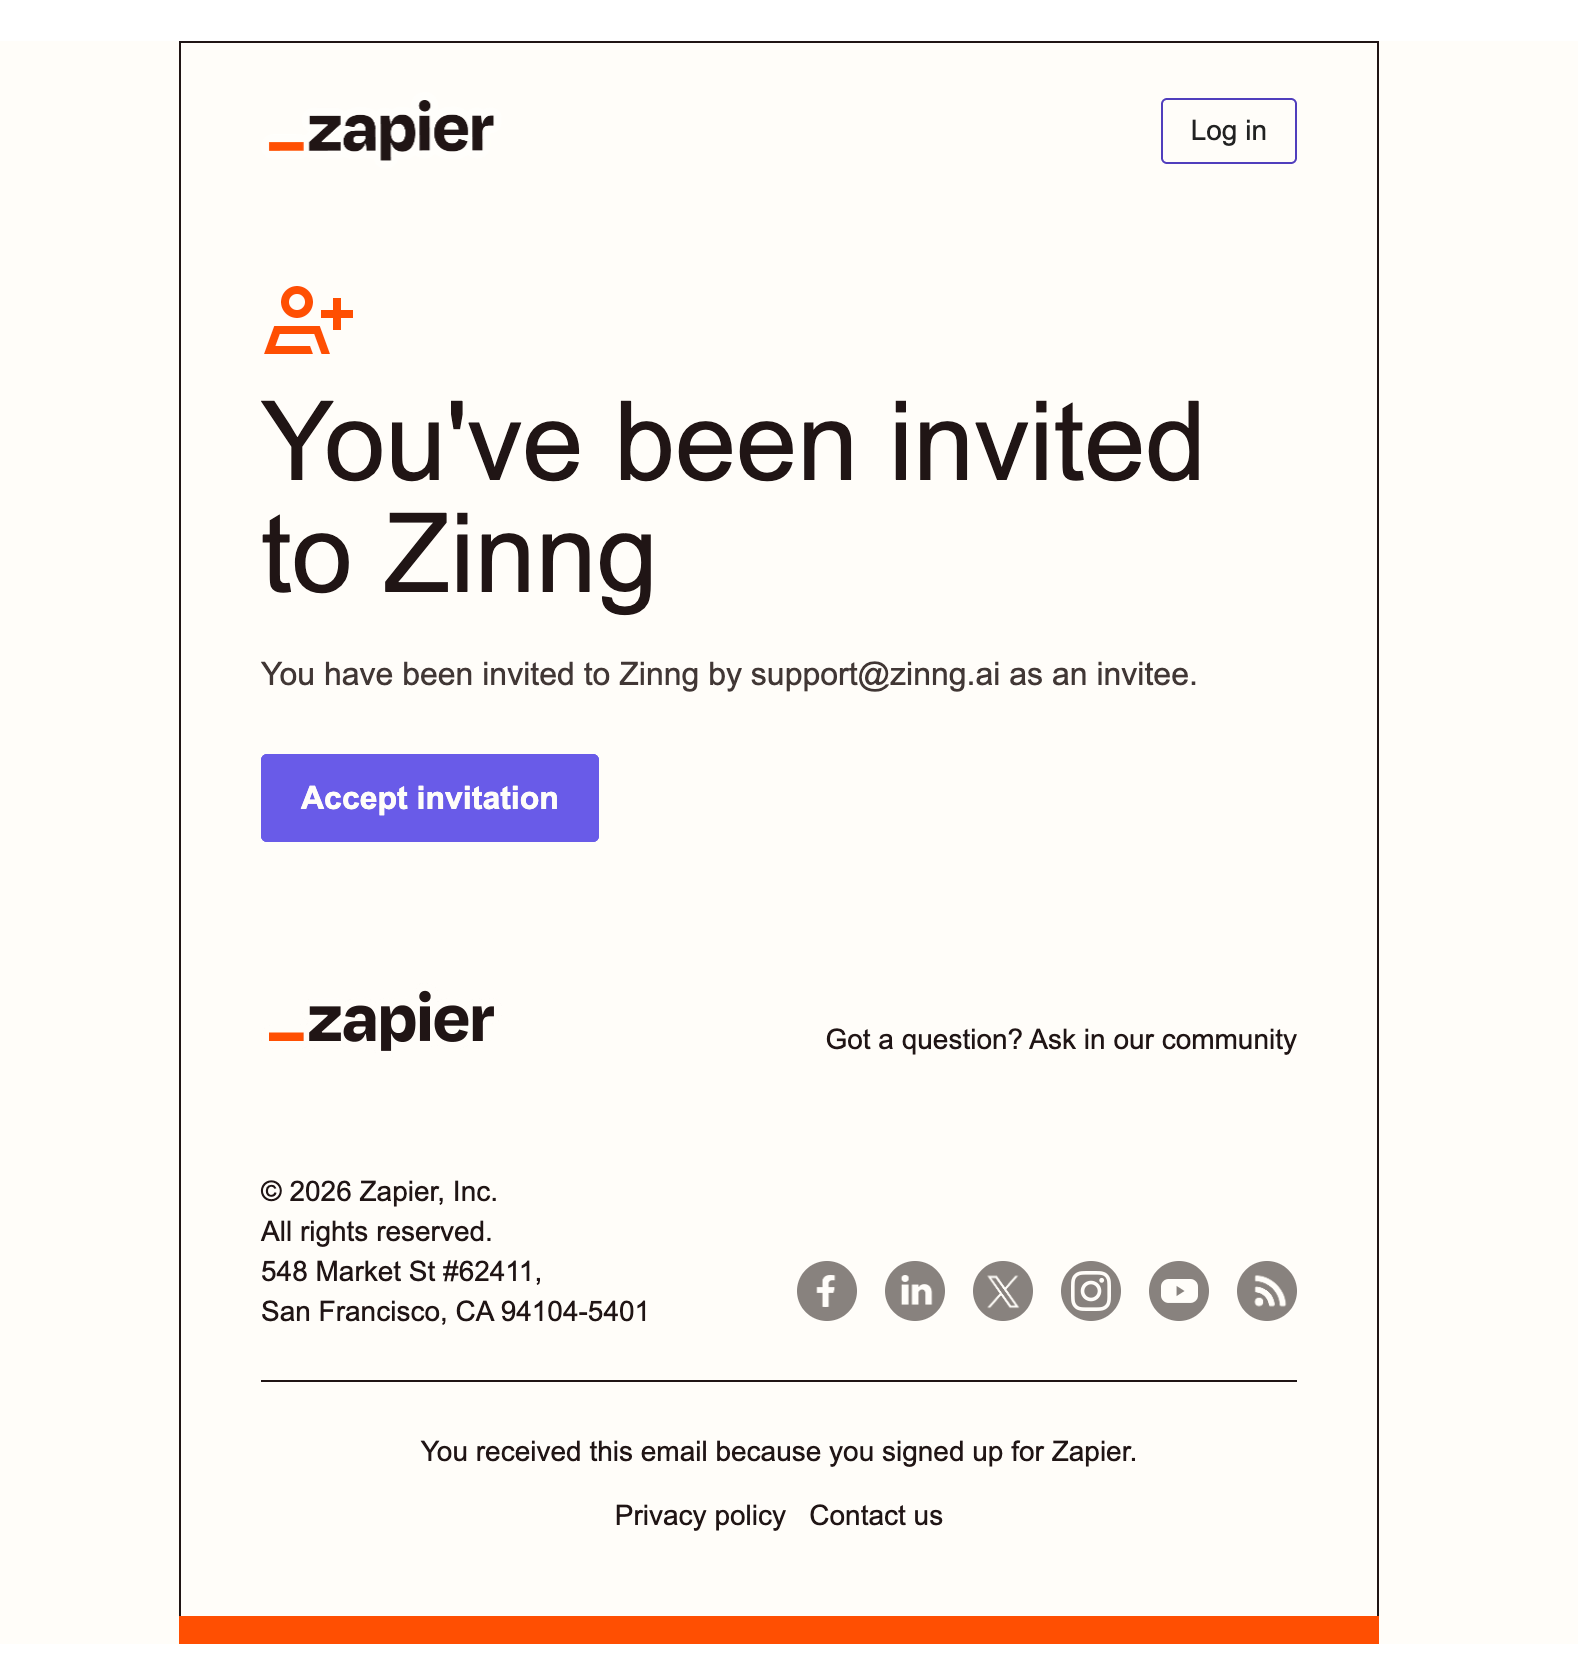
You'll then receive an invitation email from Zapier that looks like the one below. Click Accept invitation to get access.
2. Enable the "Zapier: Call Finished Trigger" add-on
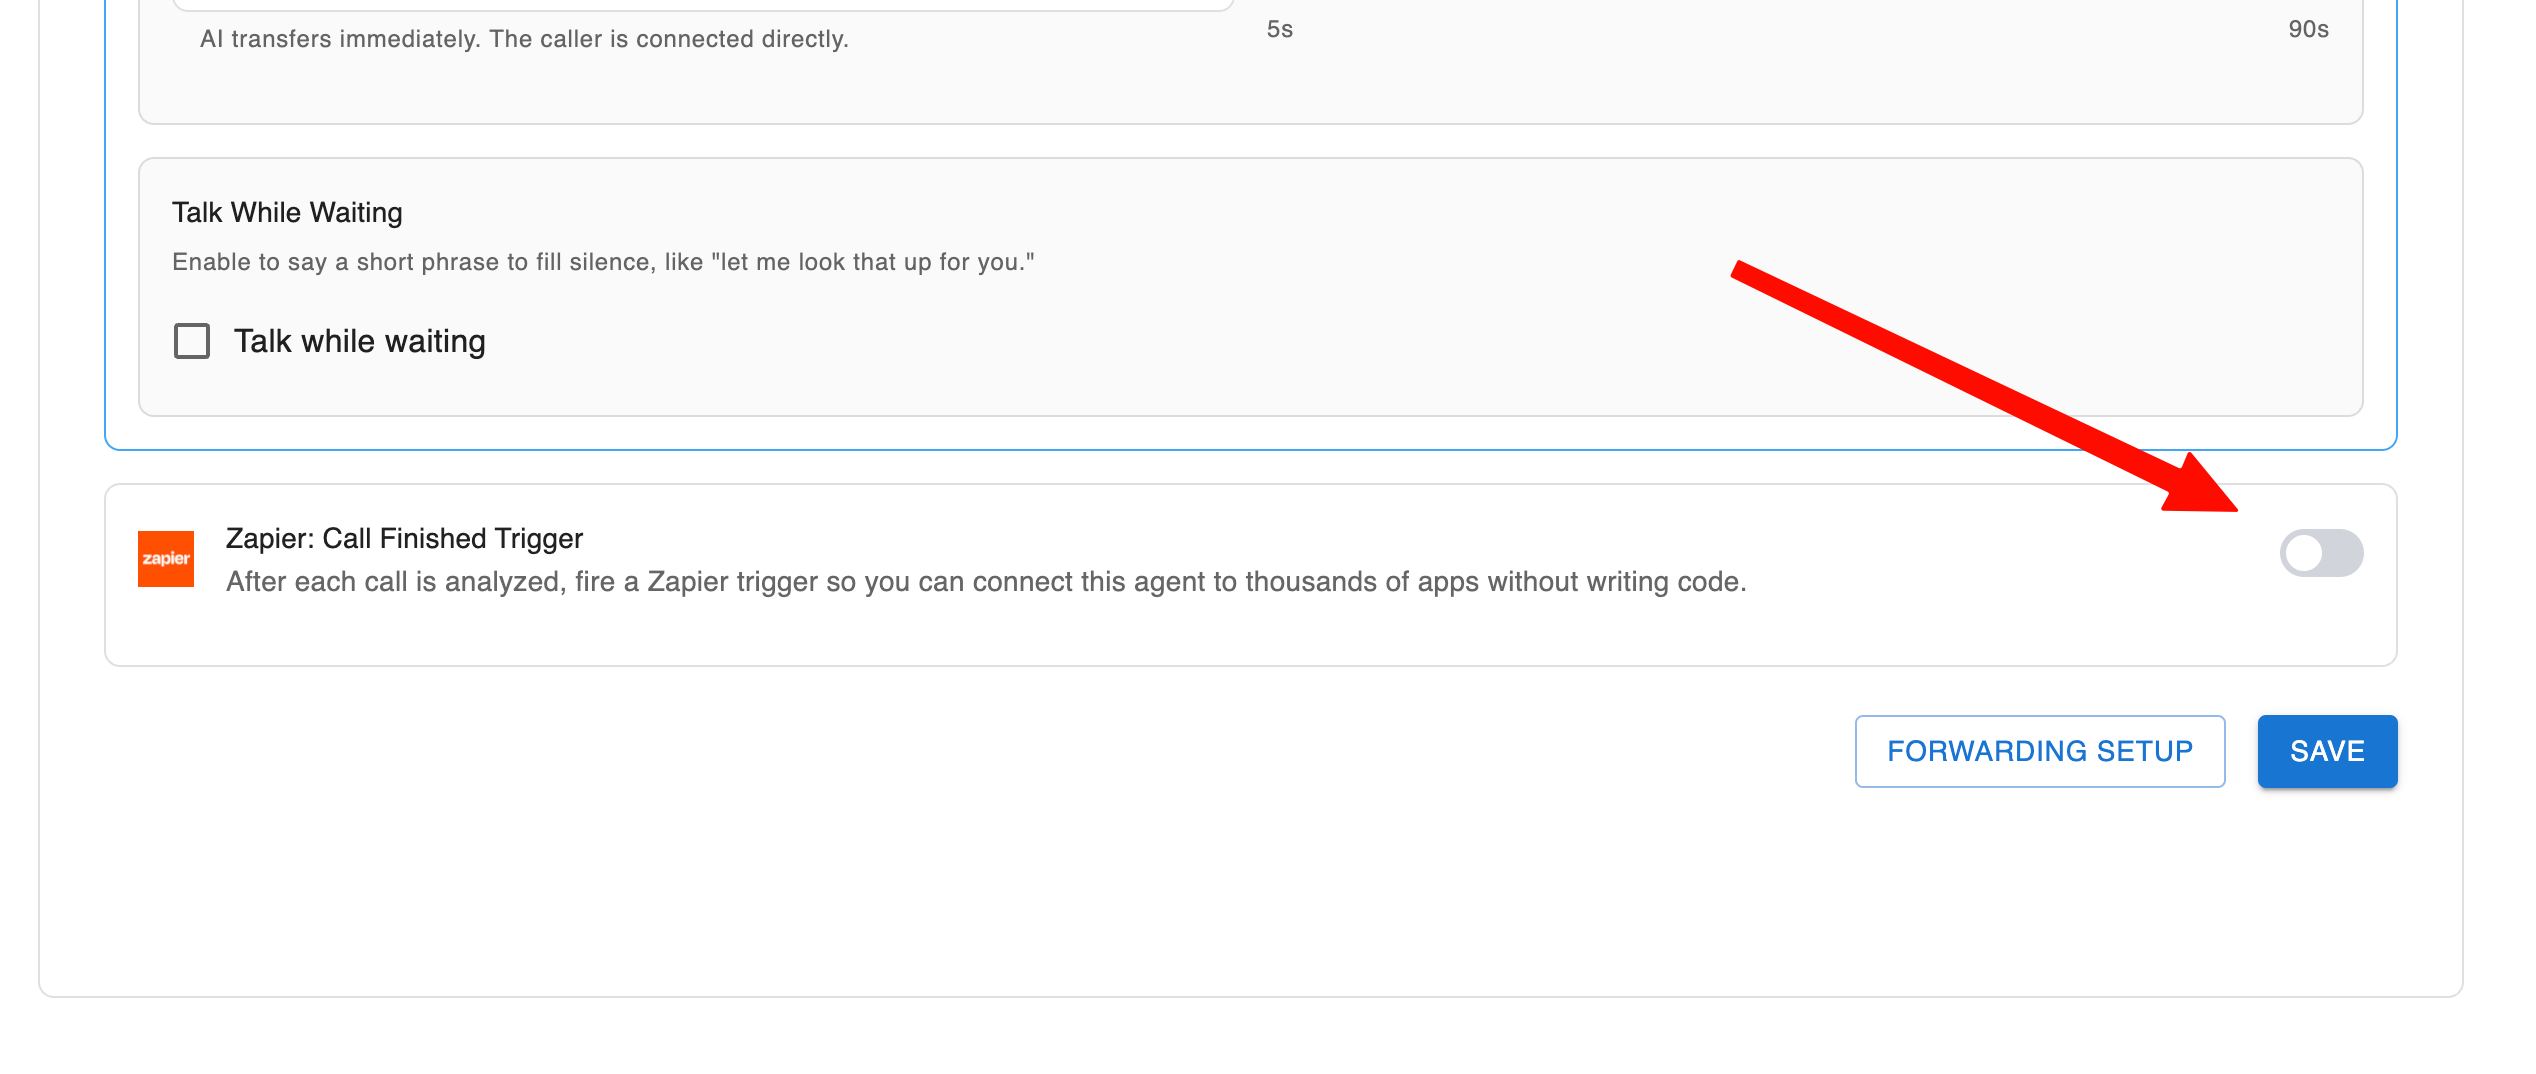
In your Zinng dashboard, go to AI Phone Agents → Agents and click the agent you want to connect. Scroll to the very bottom of the settings page to the Add-on capabilities section, where you'll find Zapier: Call Finished Trigger. Turn the toggle on, then click Save.
3. Generate your Zinng API key
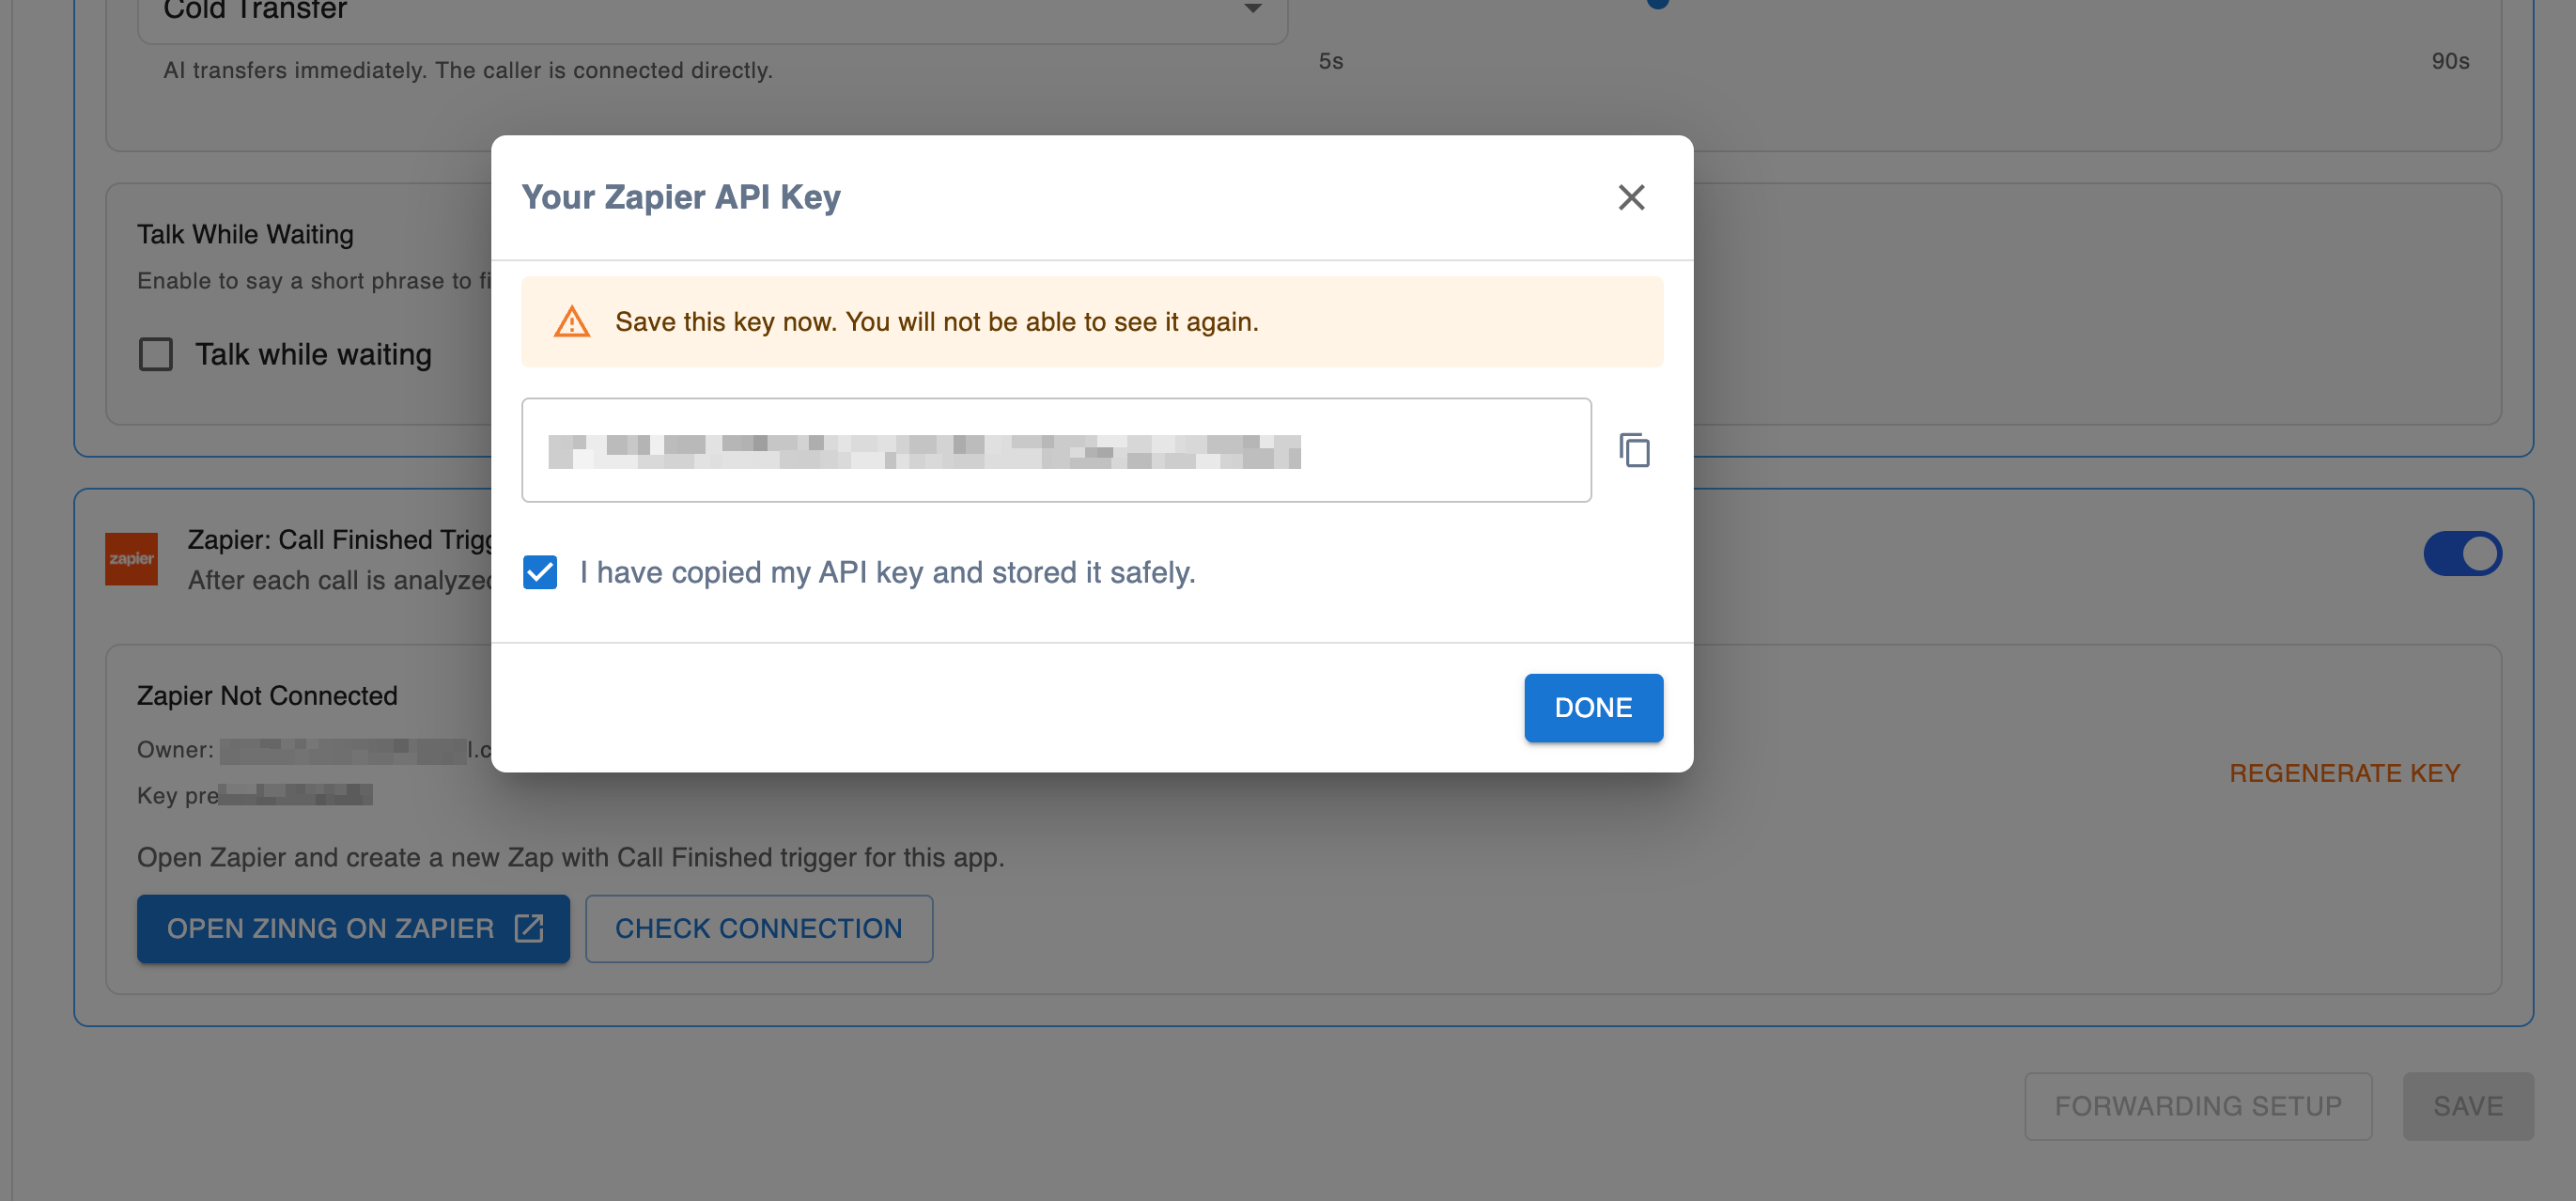
Zapier needs a Zinng API key to connect to your account. In your Zinng dashboard, generate an API key (from Team Settings → API Keys, which is also linked from the Zapier add-on panel). Zinng shows the key to you only once, in a popup.
4. Create a Zap
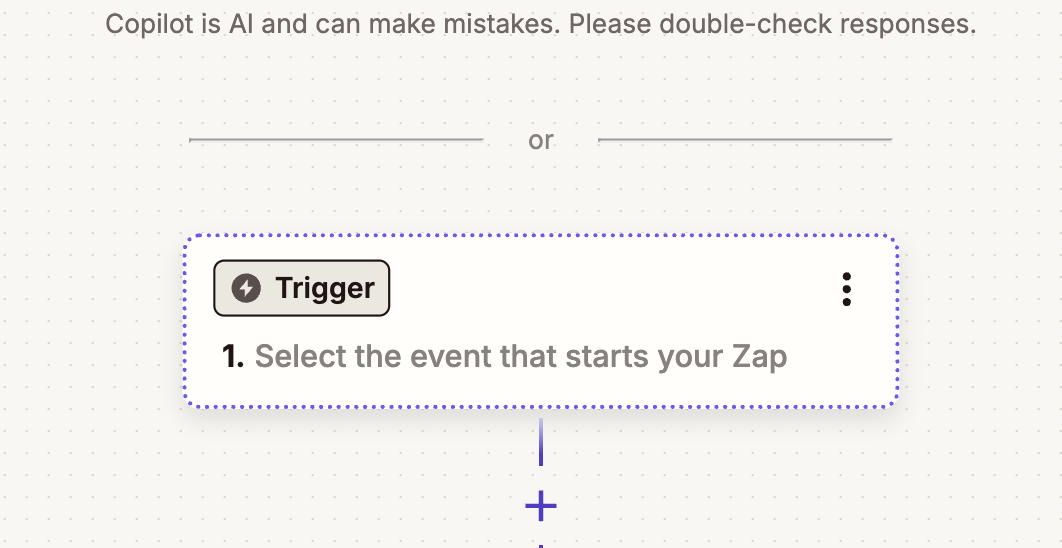
Head back to Zapier and create a new Zap. The first block is the Trigger, the event that starts your automation. Click it to choose your trigger app.
5. Set up the trigger (Zinng "Call Finished")
In the trigger app search, type Zinng and select the Zinng app from the results.
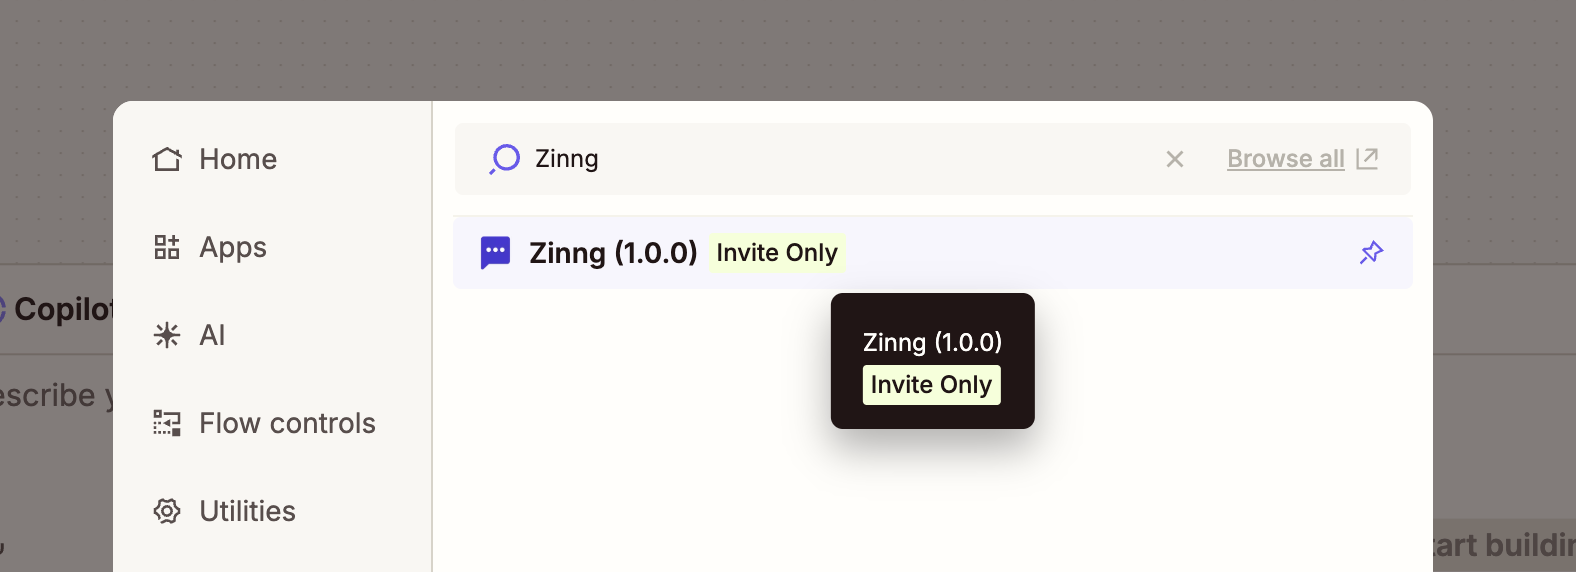
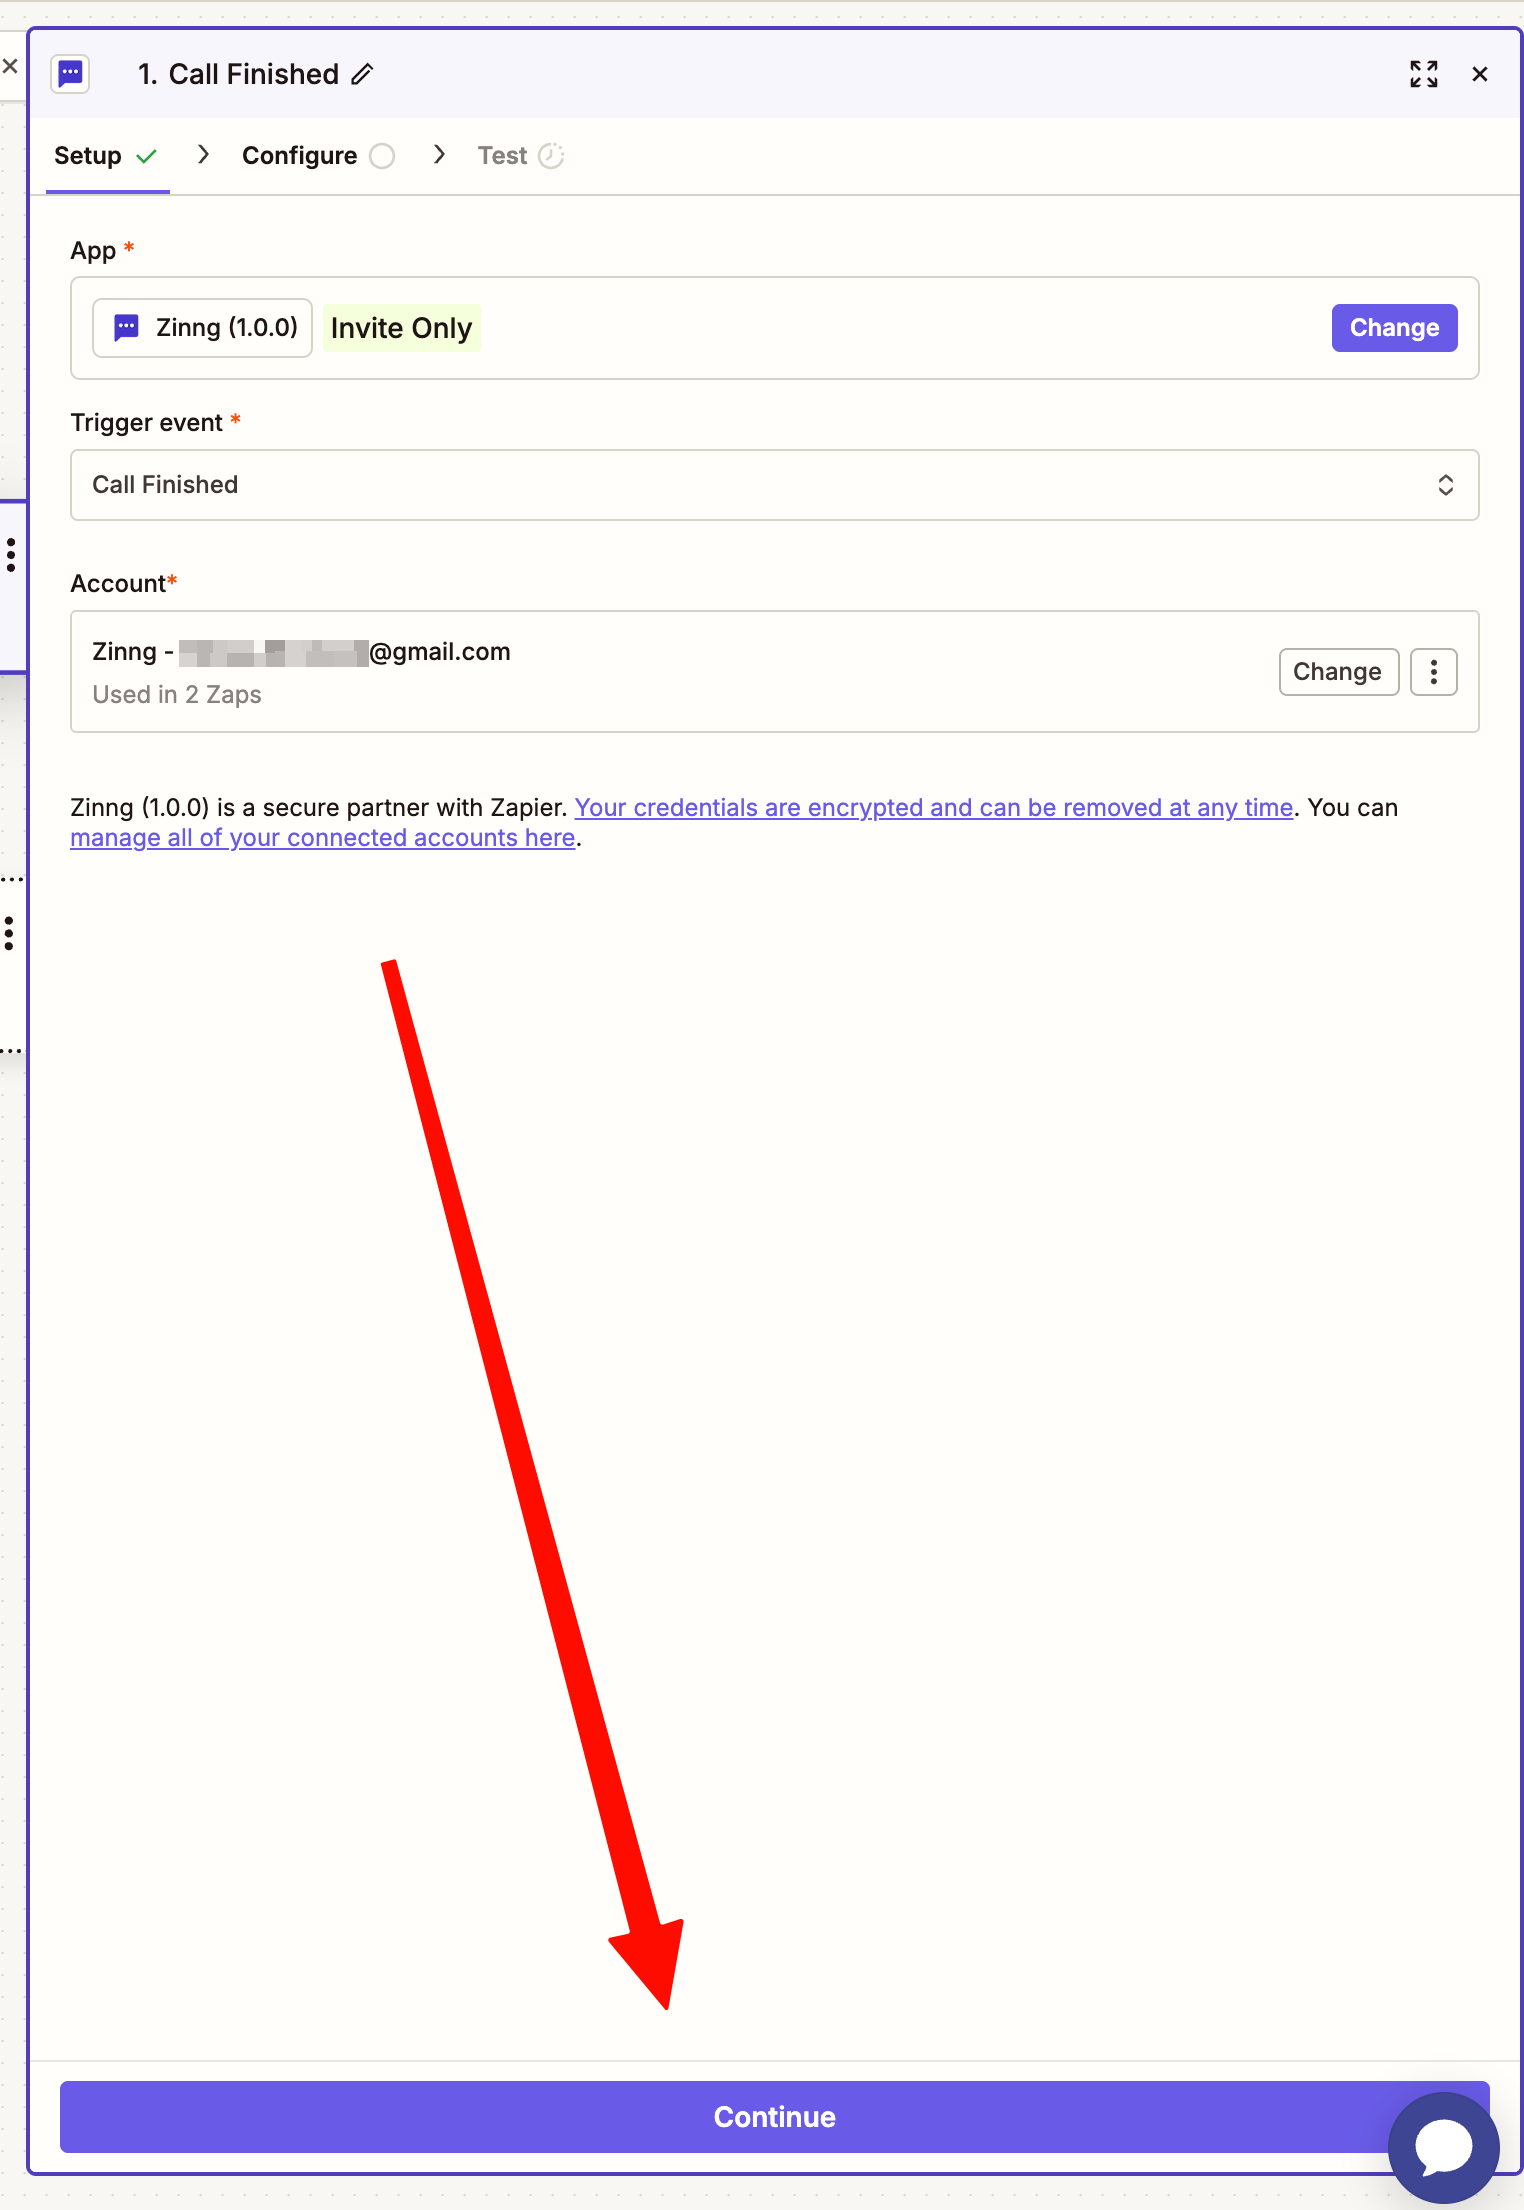
While the integration is invite-only, you'll see an "Invite Only" badge next to the Zinng app. Once you've accepted the invitation from step 1 you can select it normally, and this badge goes away once Zapier makes the integration public.
On the Setup tab, set the Trigger event to Call Finished. Then connect your Zinng account: click to add a new account and paste the Zinng API key you generated in step 3 when prompted.
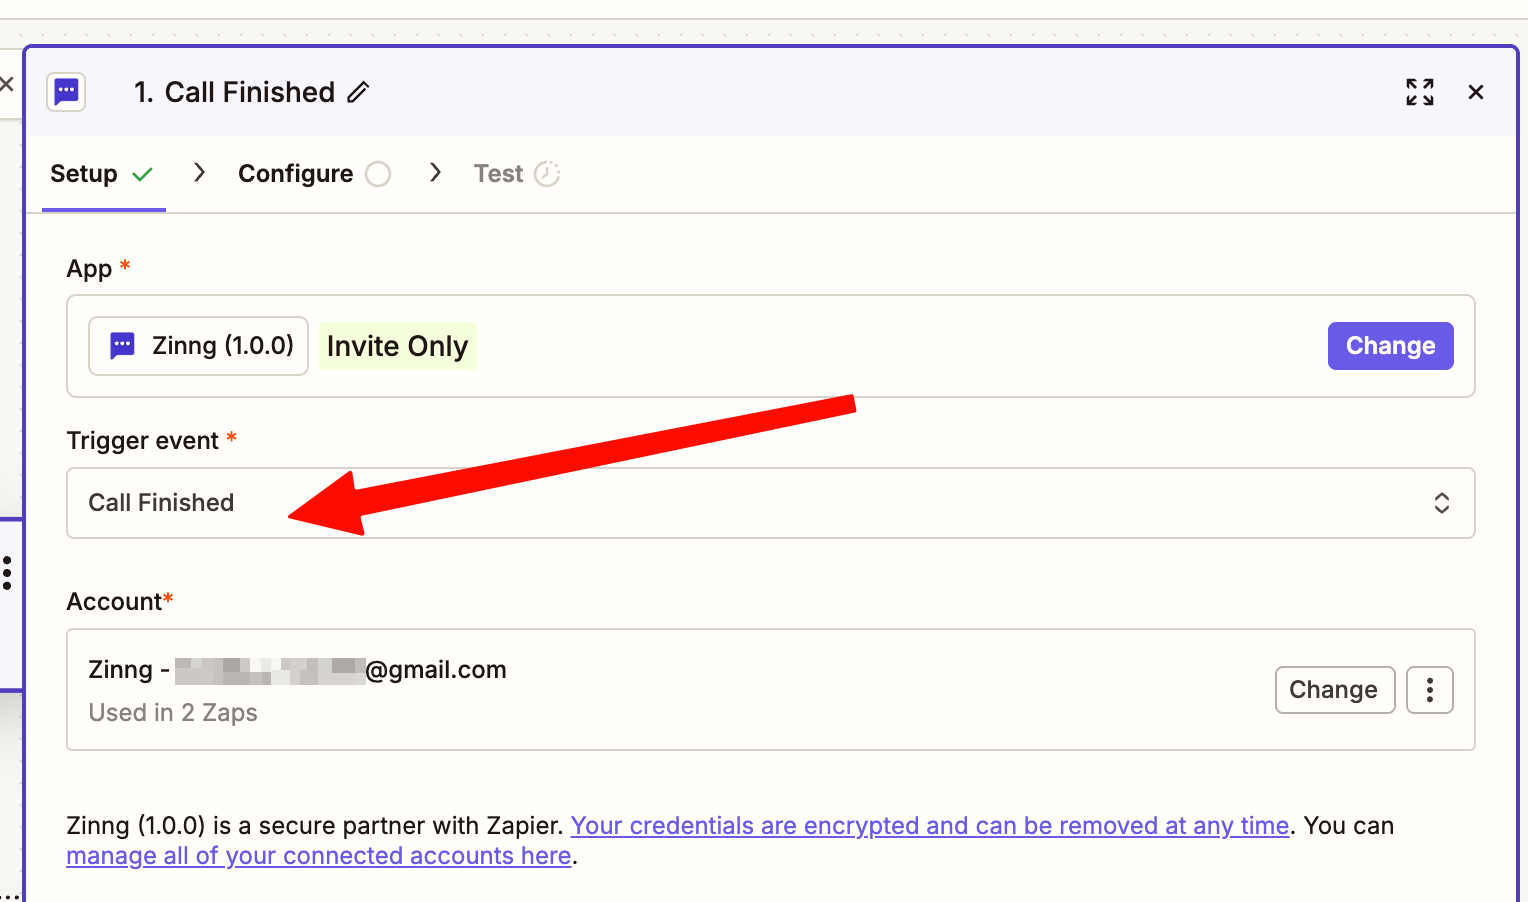
In this screenshot a Zinng account is already connected. The first time you do this you won't see a connected account yet, you'll be prompted to sign in and enter your API key.
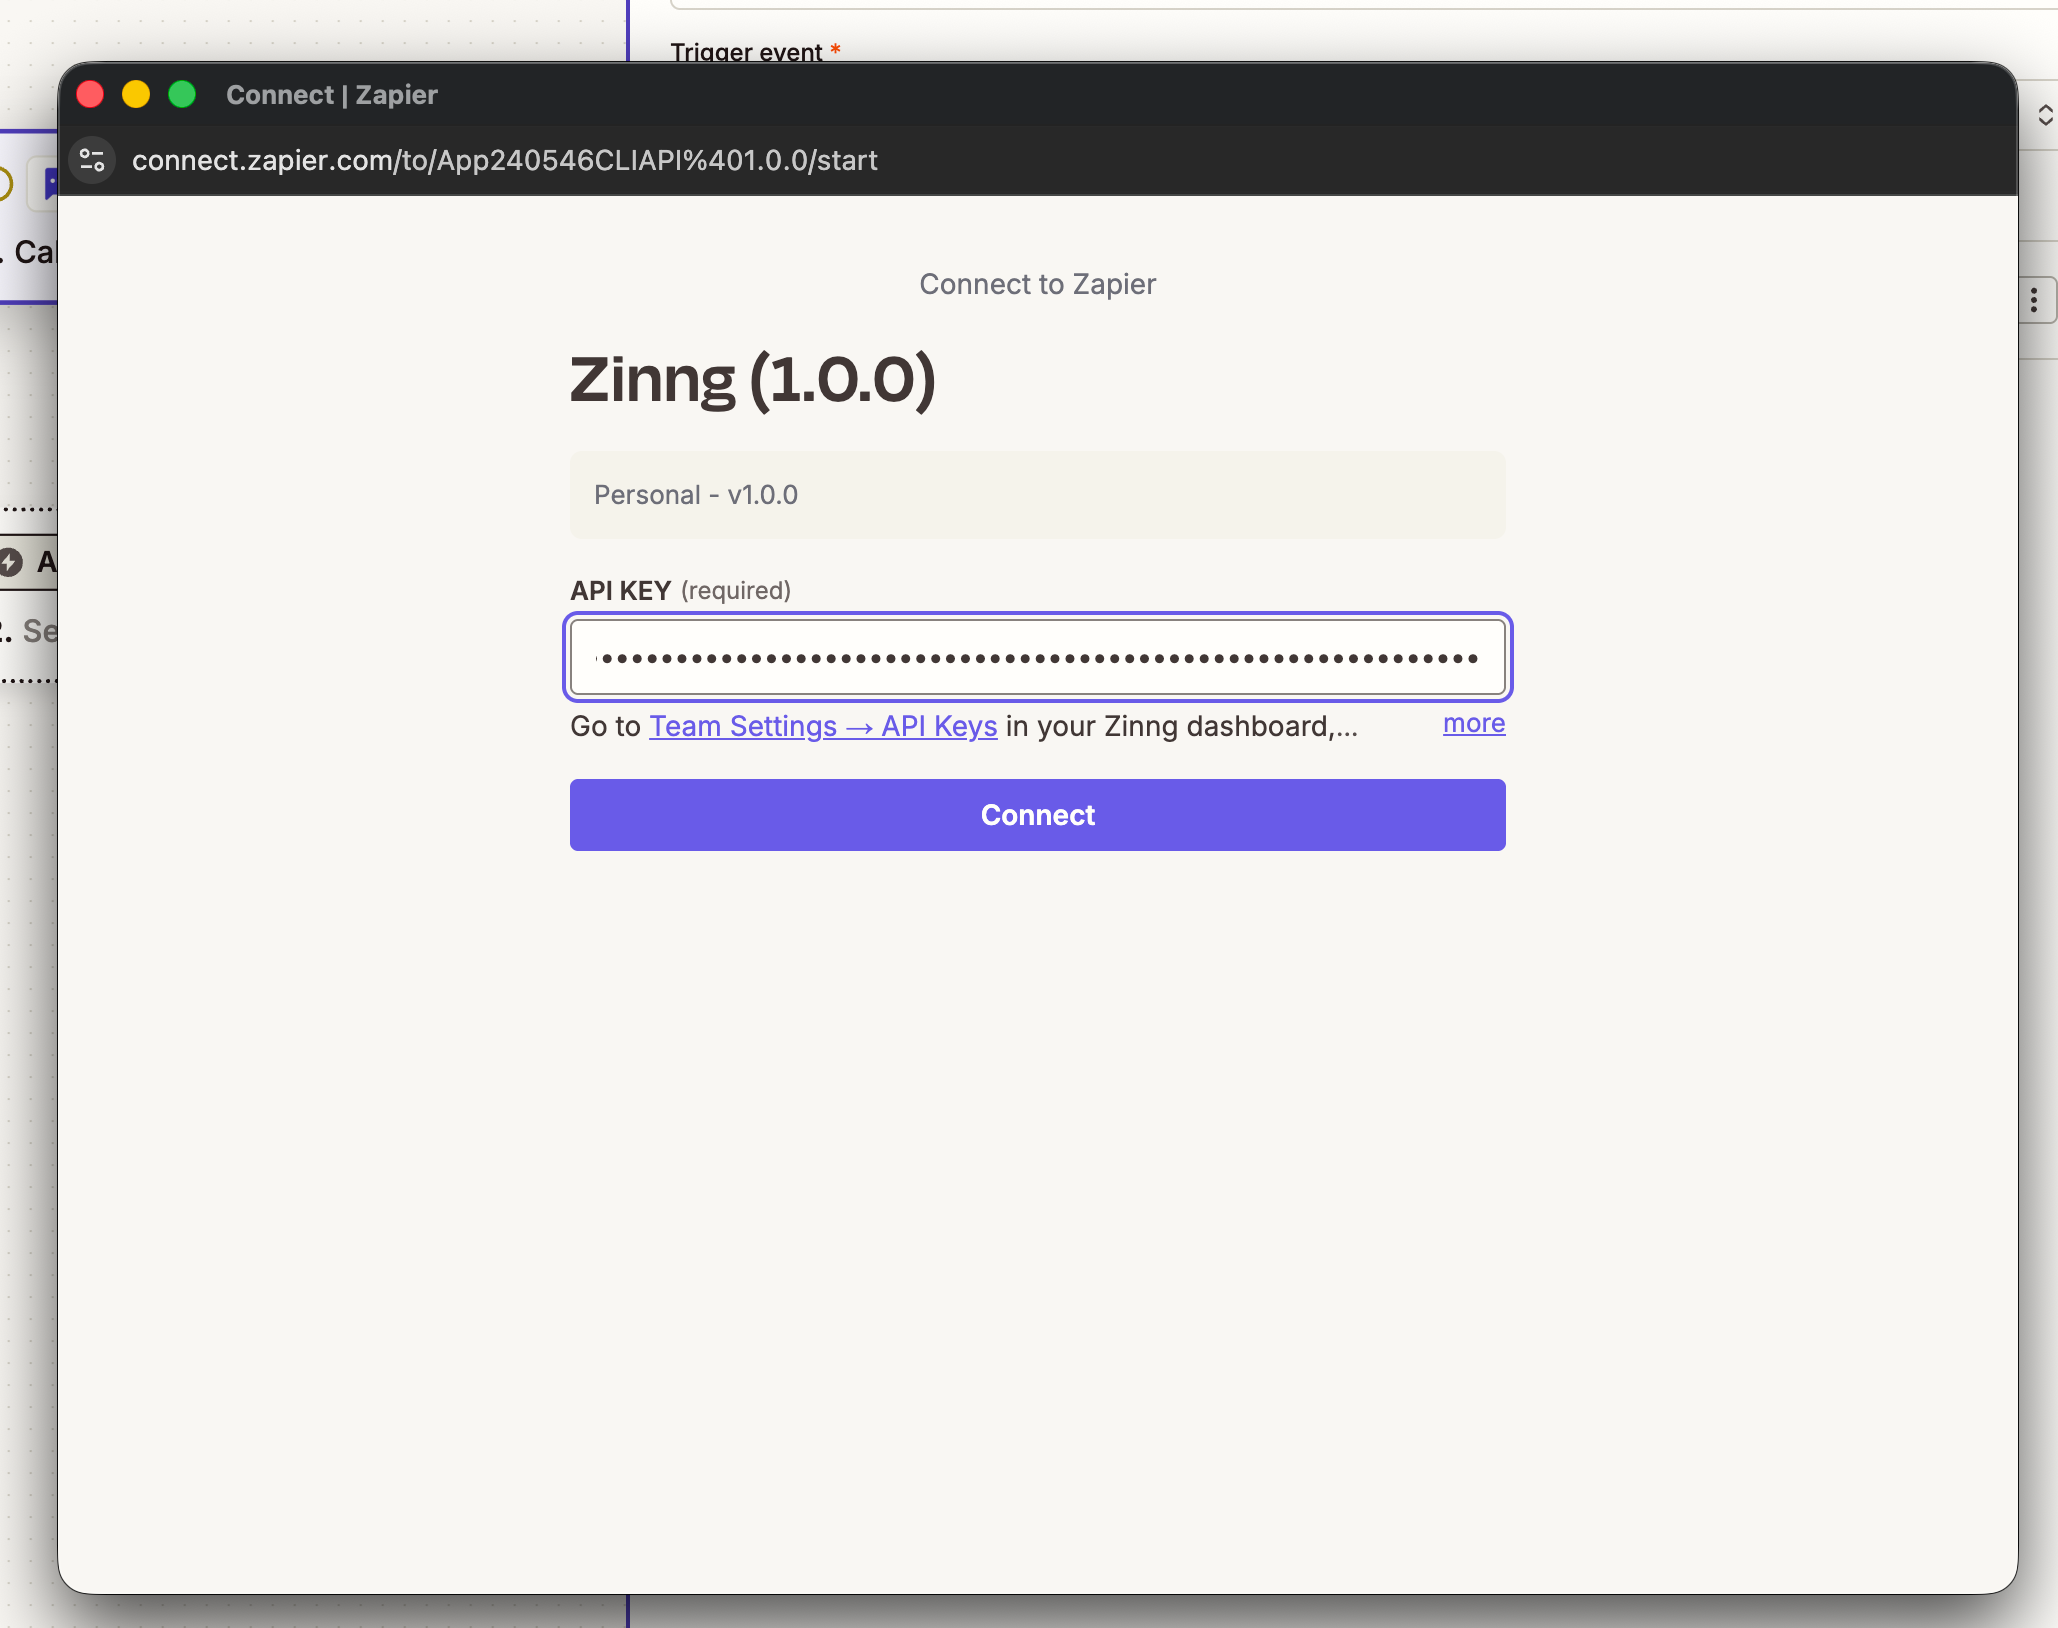
When you connect a new account, Zapier opens a popup asking for your Zinng API key. Paste the key you generated in step 3, then click Connect.
Once Zapier confirms it can connect to your account, your trigger setup is complete. Click Continue.
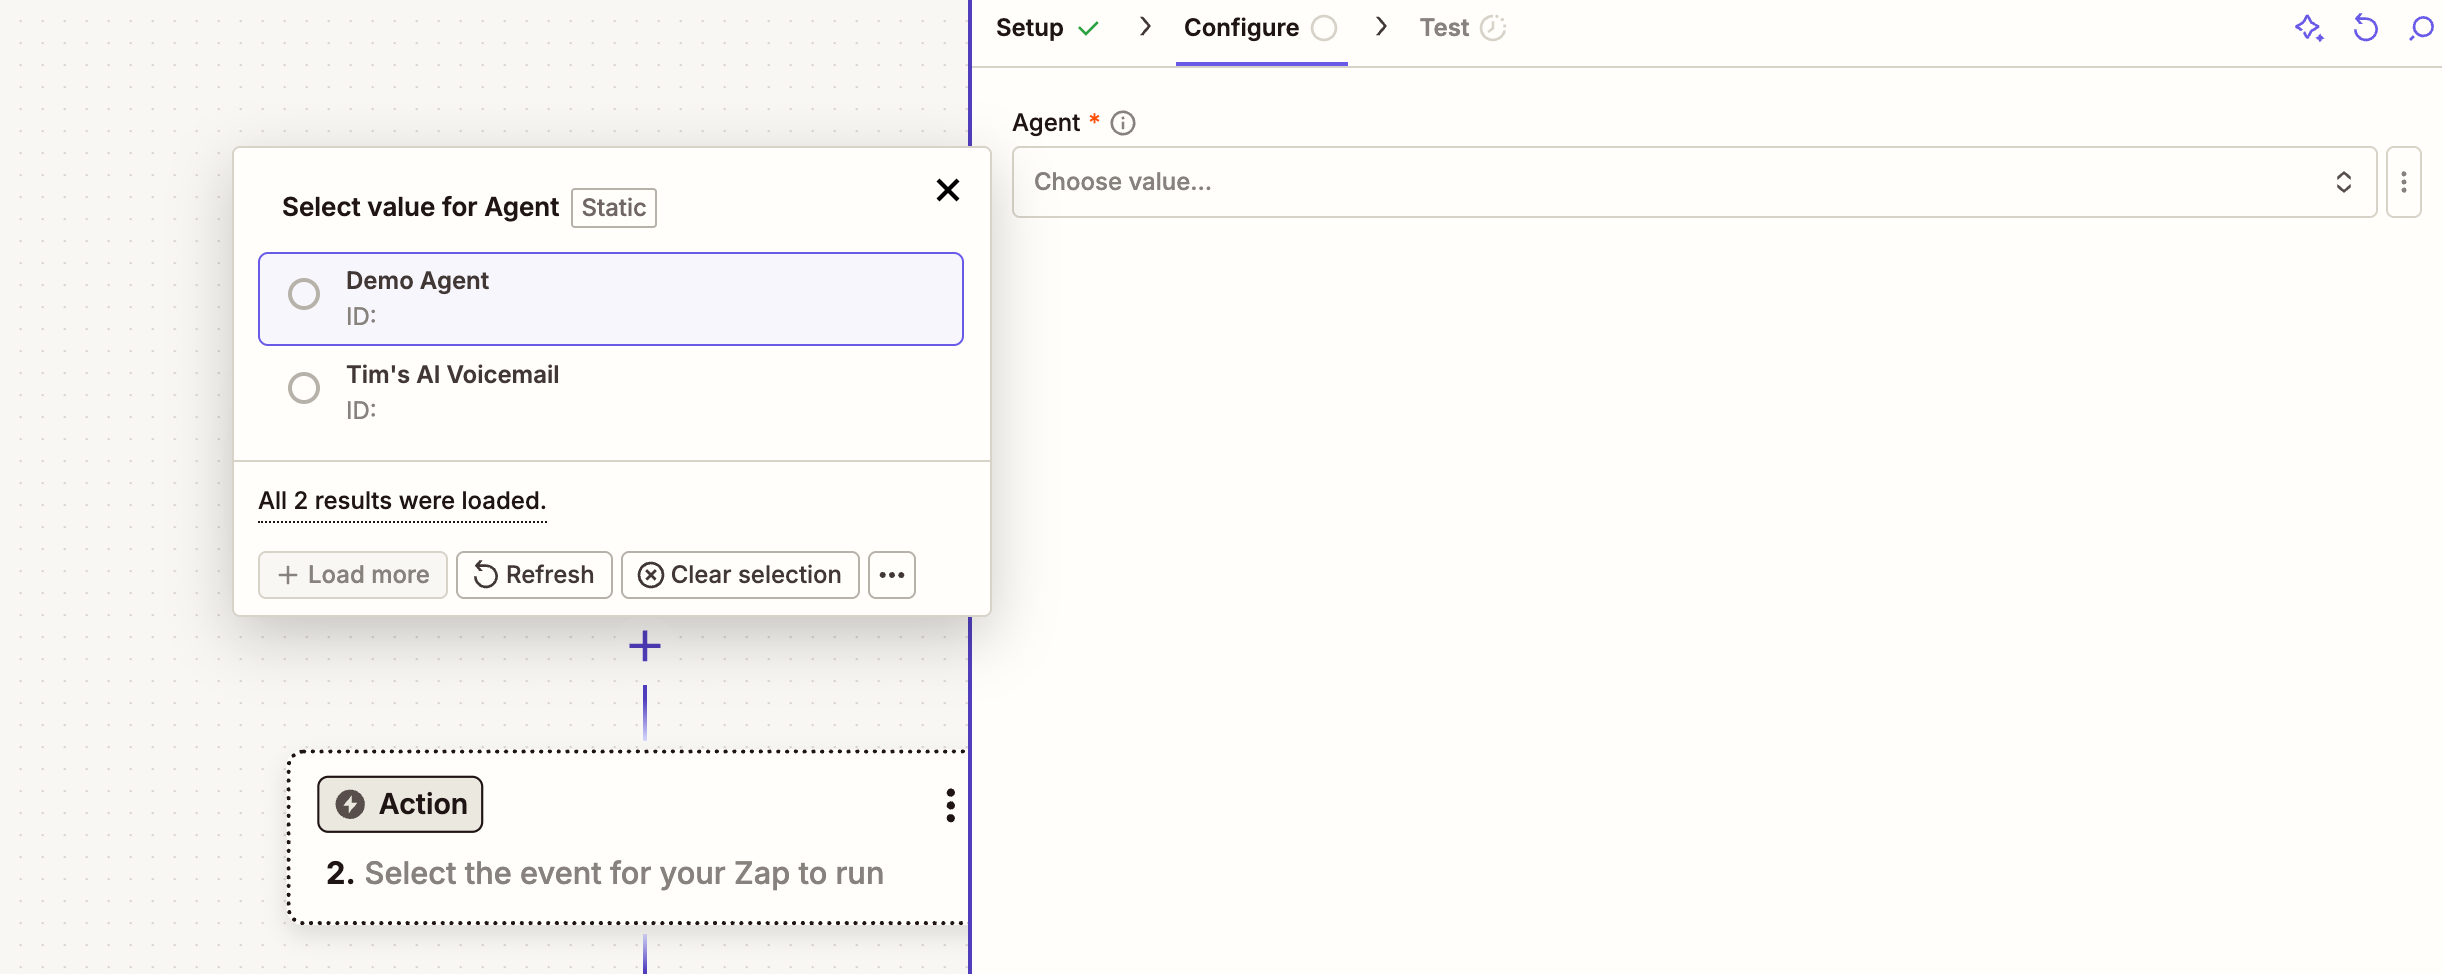
On the Configure tab, open the Agent dropdown and select the agent you want to connect. If you only have one agent, just pick the one that appears. Then click Continue.
6. Test the trigger
On the Test tab, Zapier pulls a sample call record from your account (you'll see something like "Call A") so it knows what data is available to map. Leave the record selected and click Continue with selected record.

7. Add a placeholder action and publish the Zap
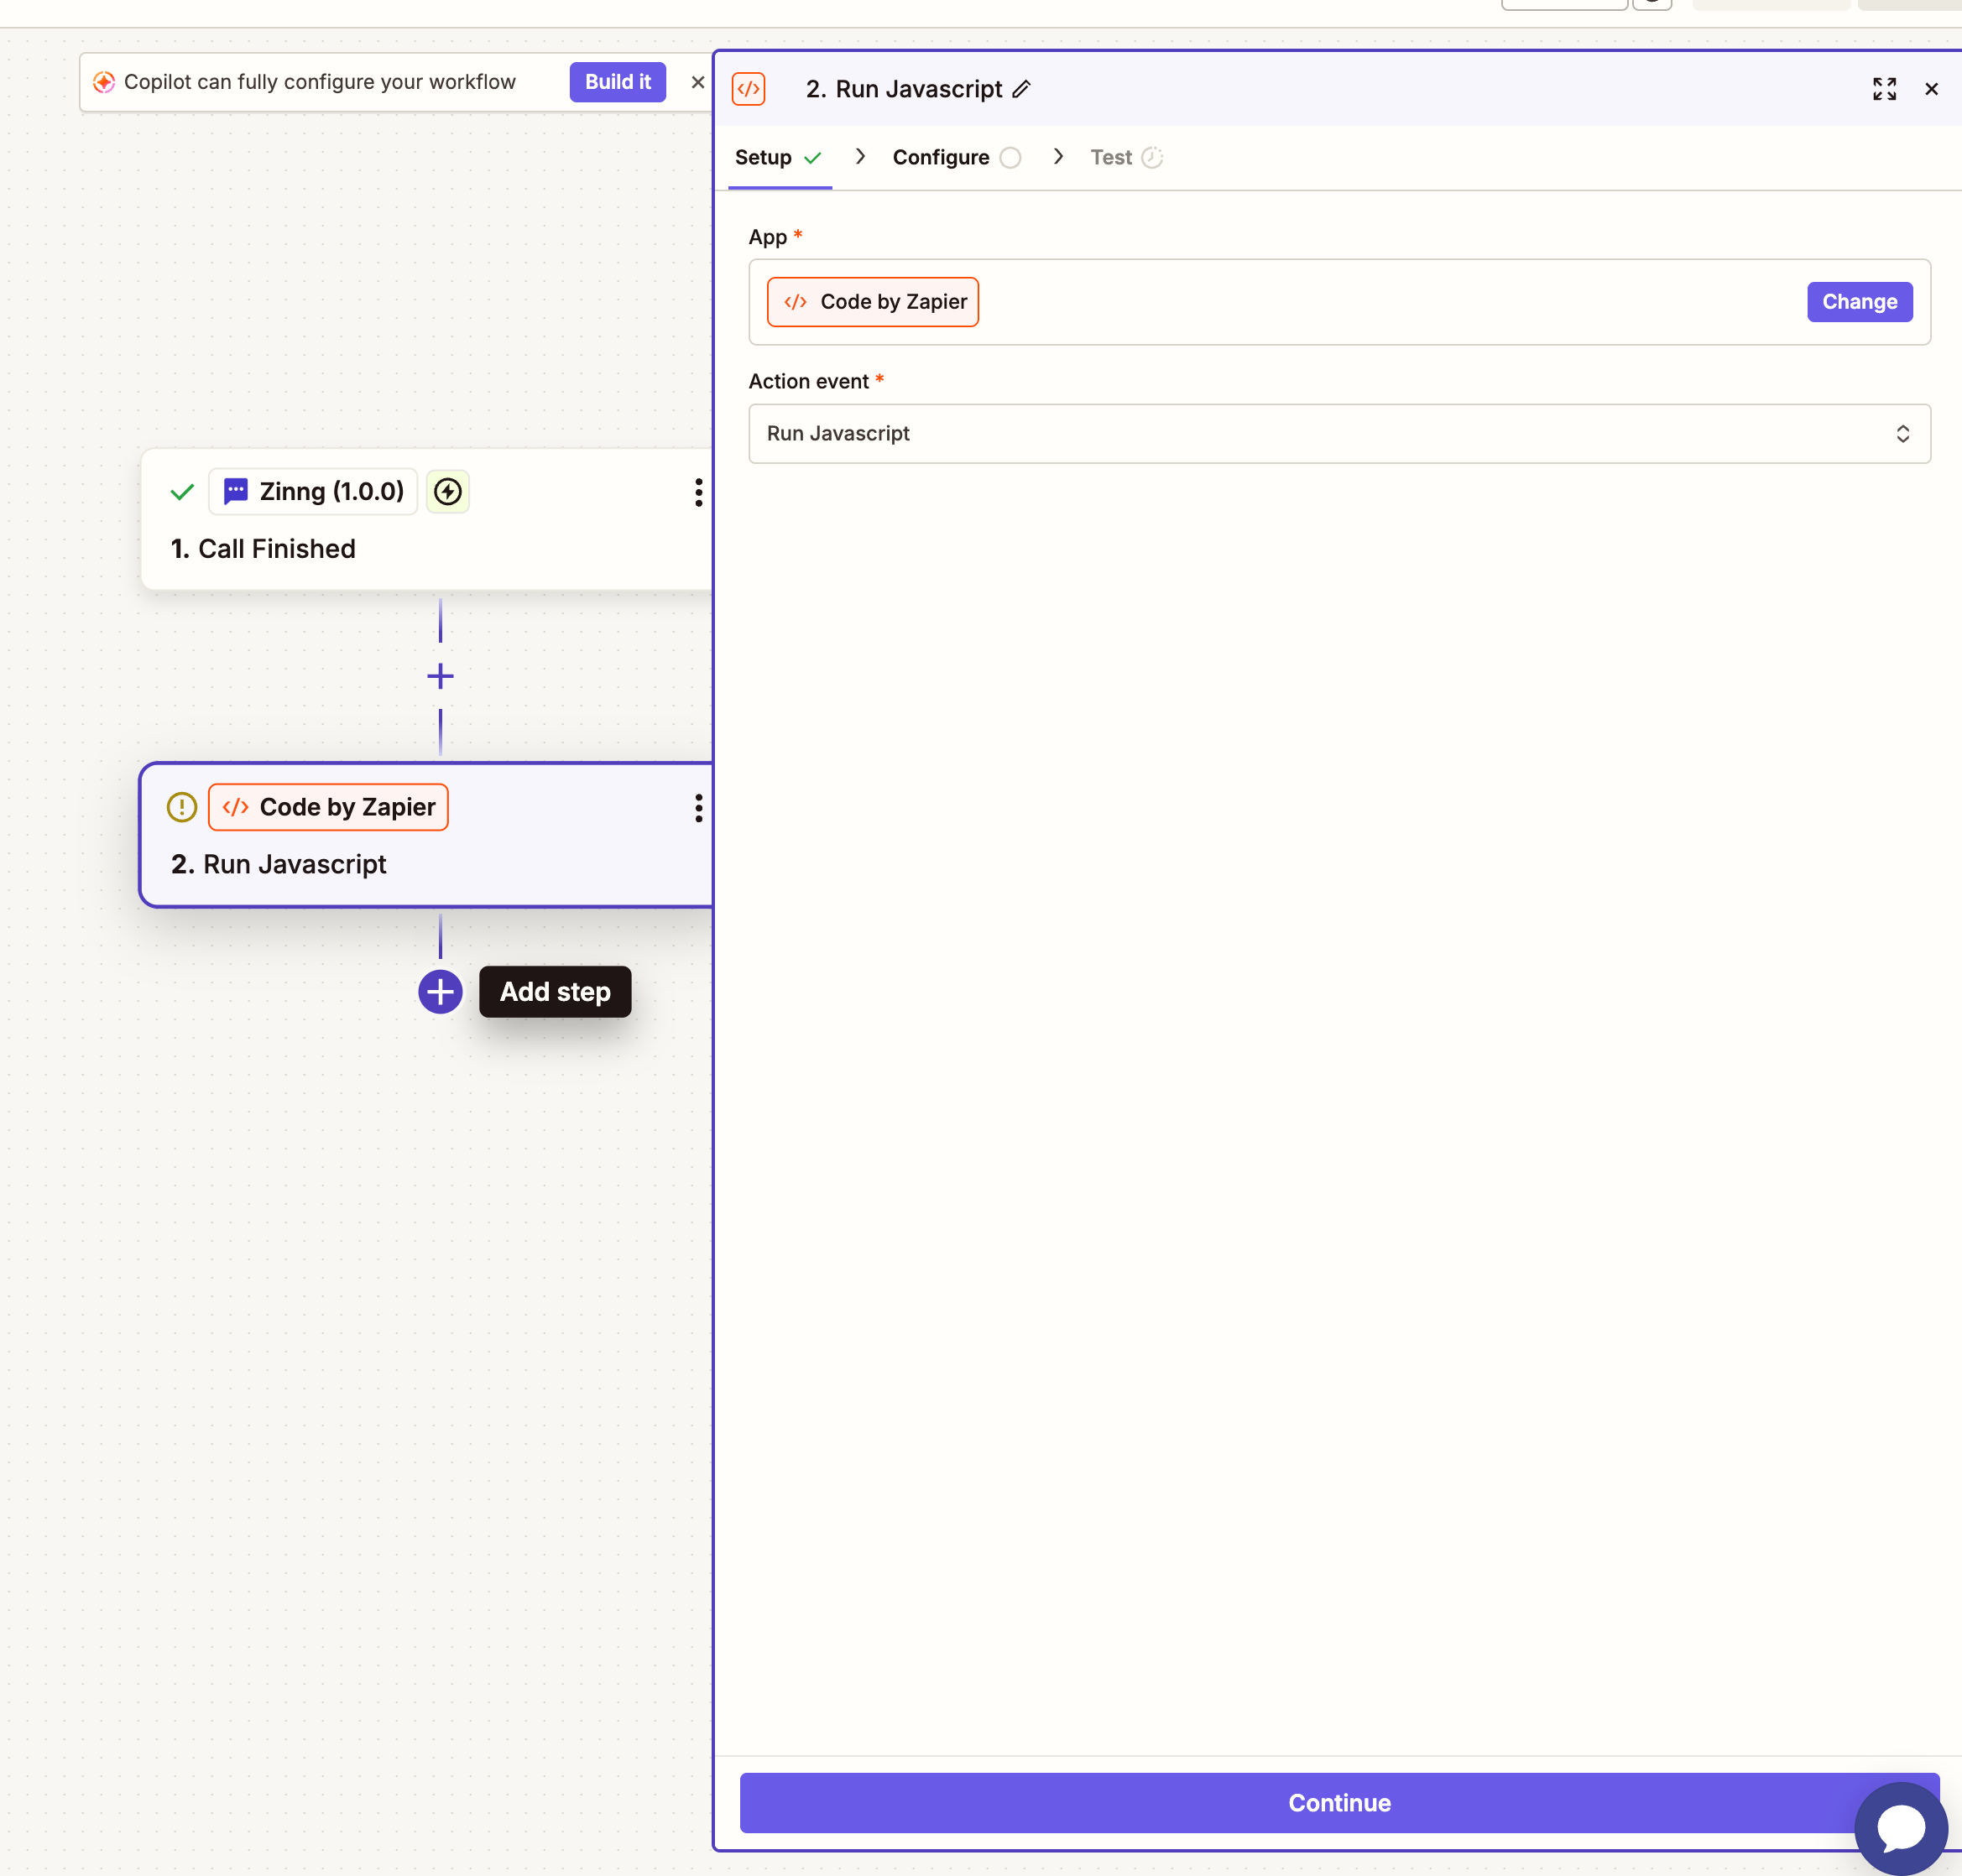
Before you can finish the connection, the Zap has to be published, and a Zap can't be published without an action step. So add a quick, harmless placeholder for now: a Code by Zapier step that you'll replace with Jotform shortly.
Add a step, choose Code by Zapier as the app and Run Javascript as the action event, then click Continue.
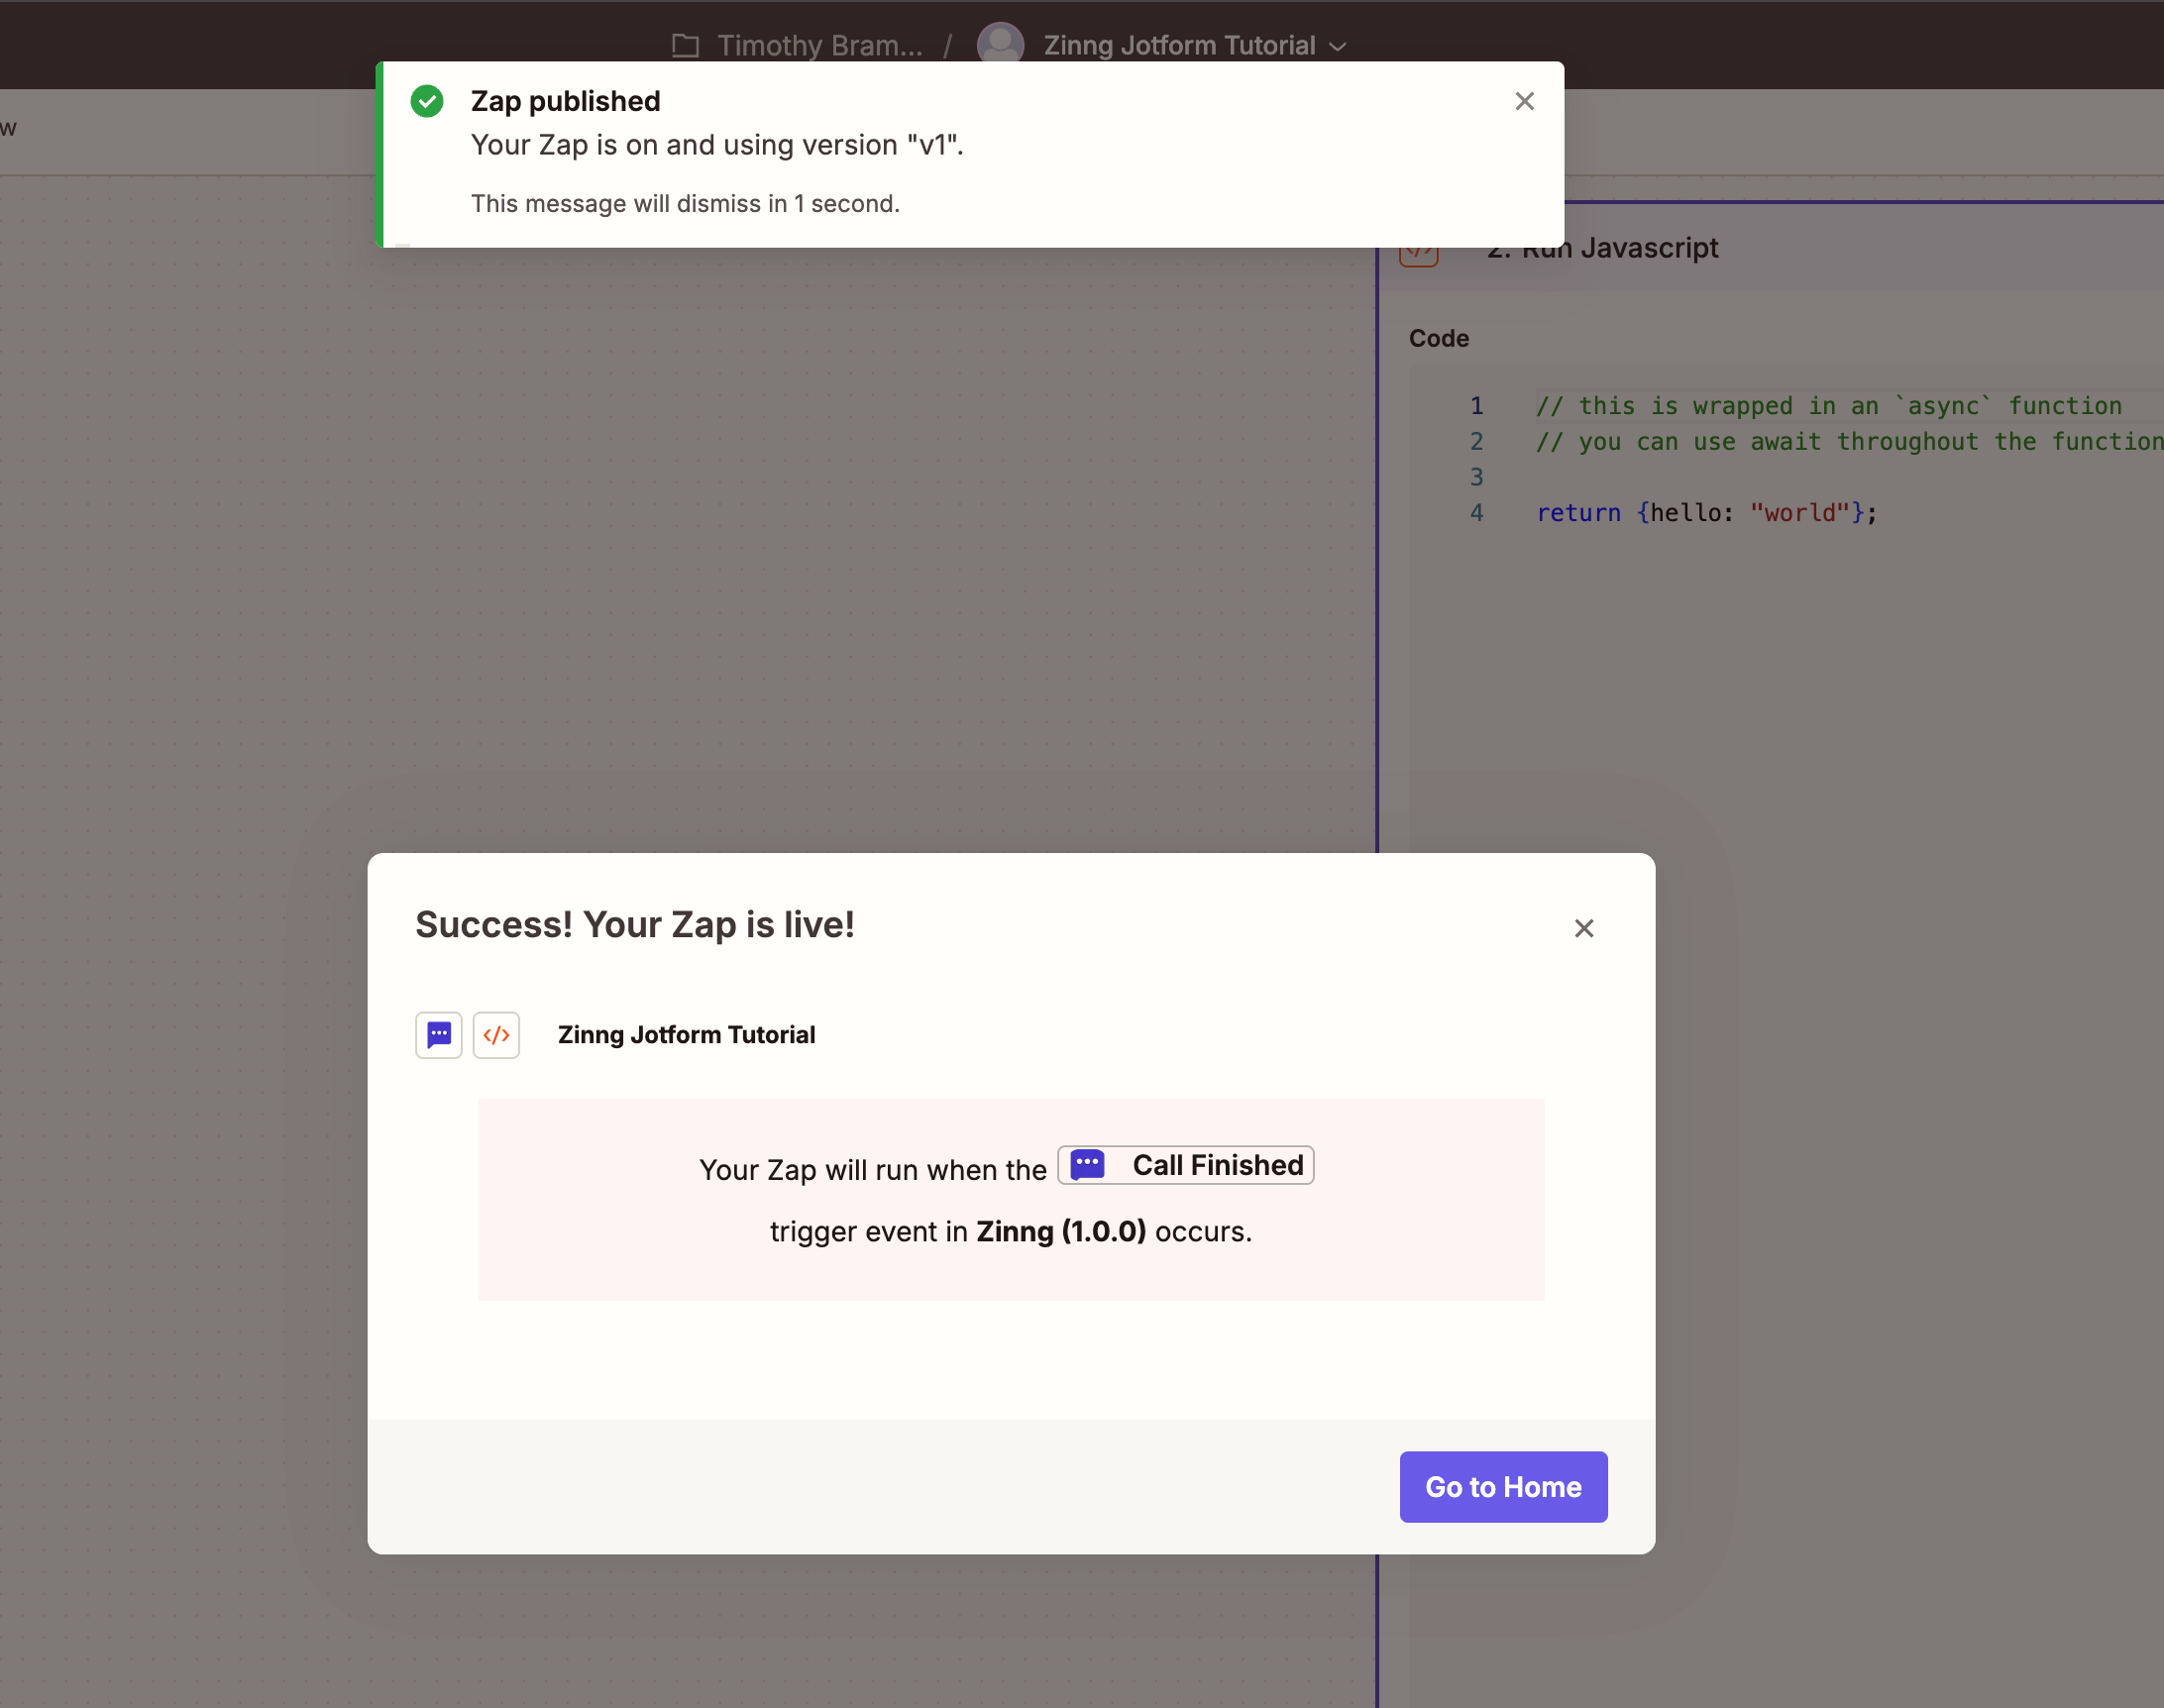
You can leave the default JavaScript exactly as it is, there's no need to change it or test it. Just click Publish. Publishing the Zap is what registers the connection back in your Zinng dashboard so you can finish the setup there.
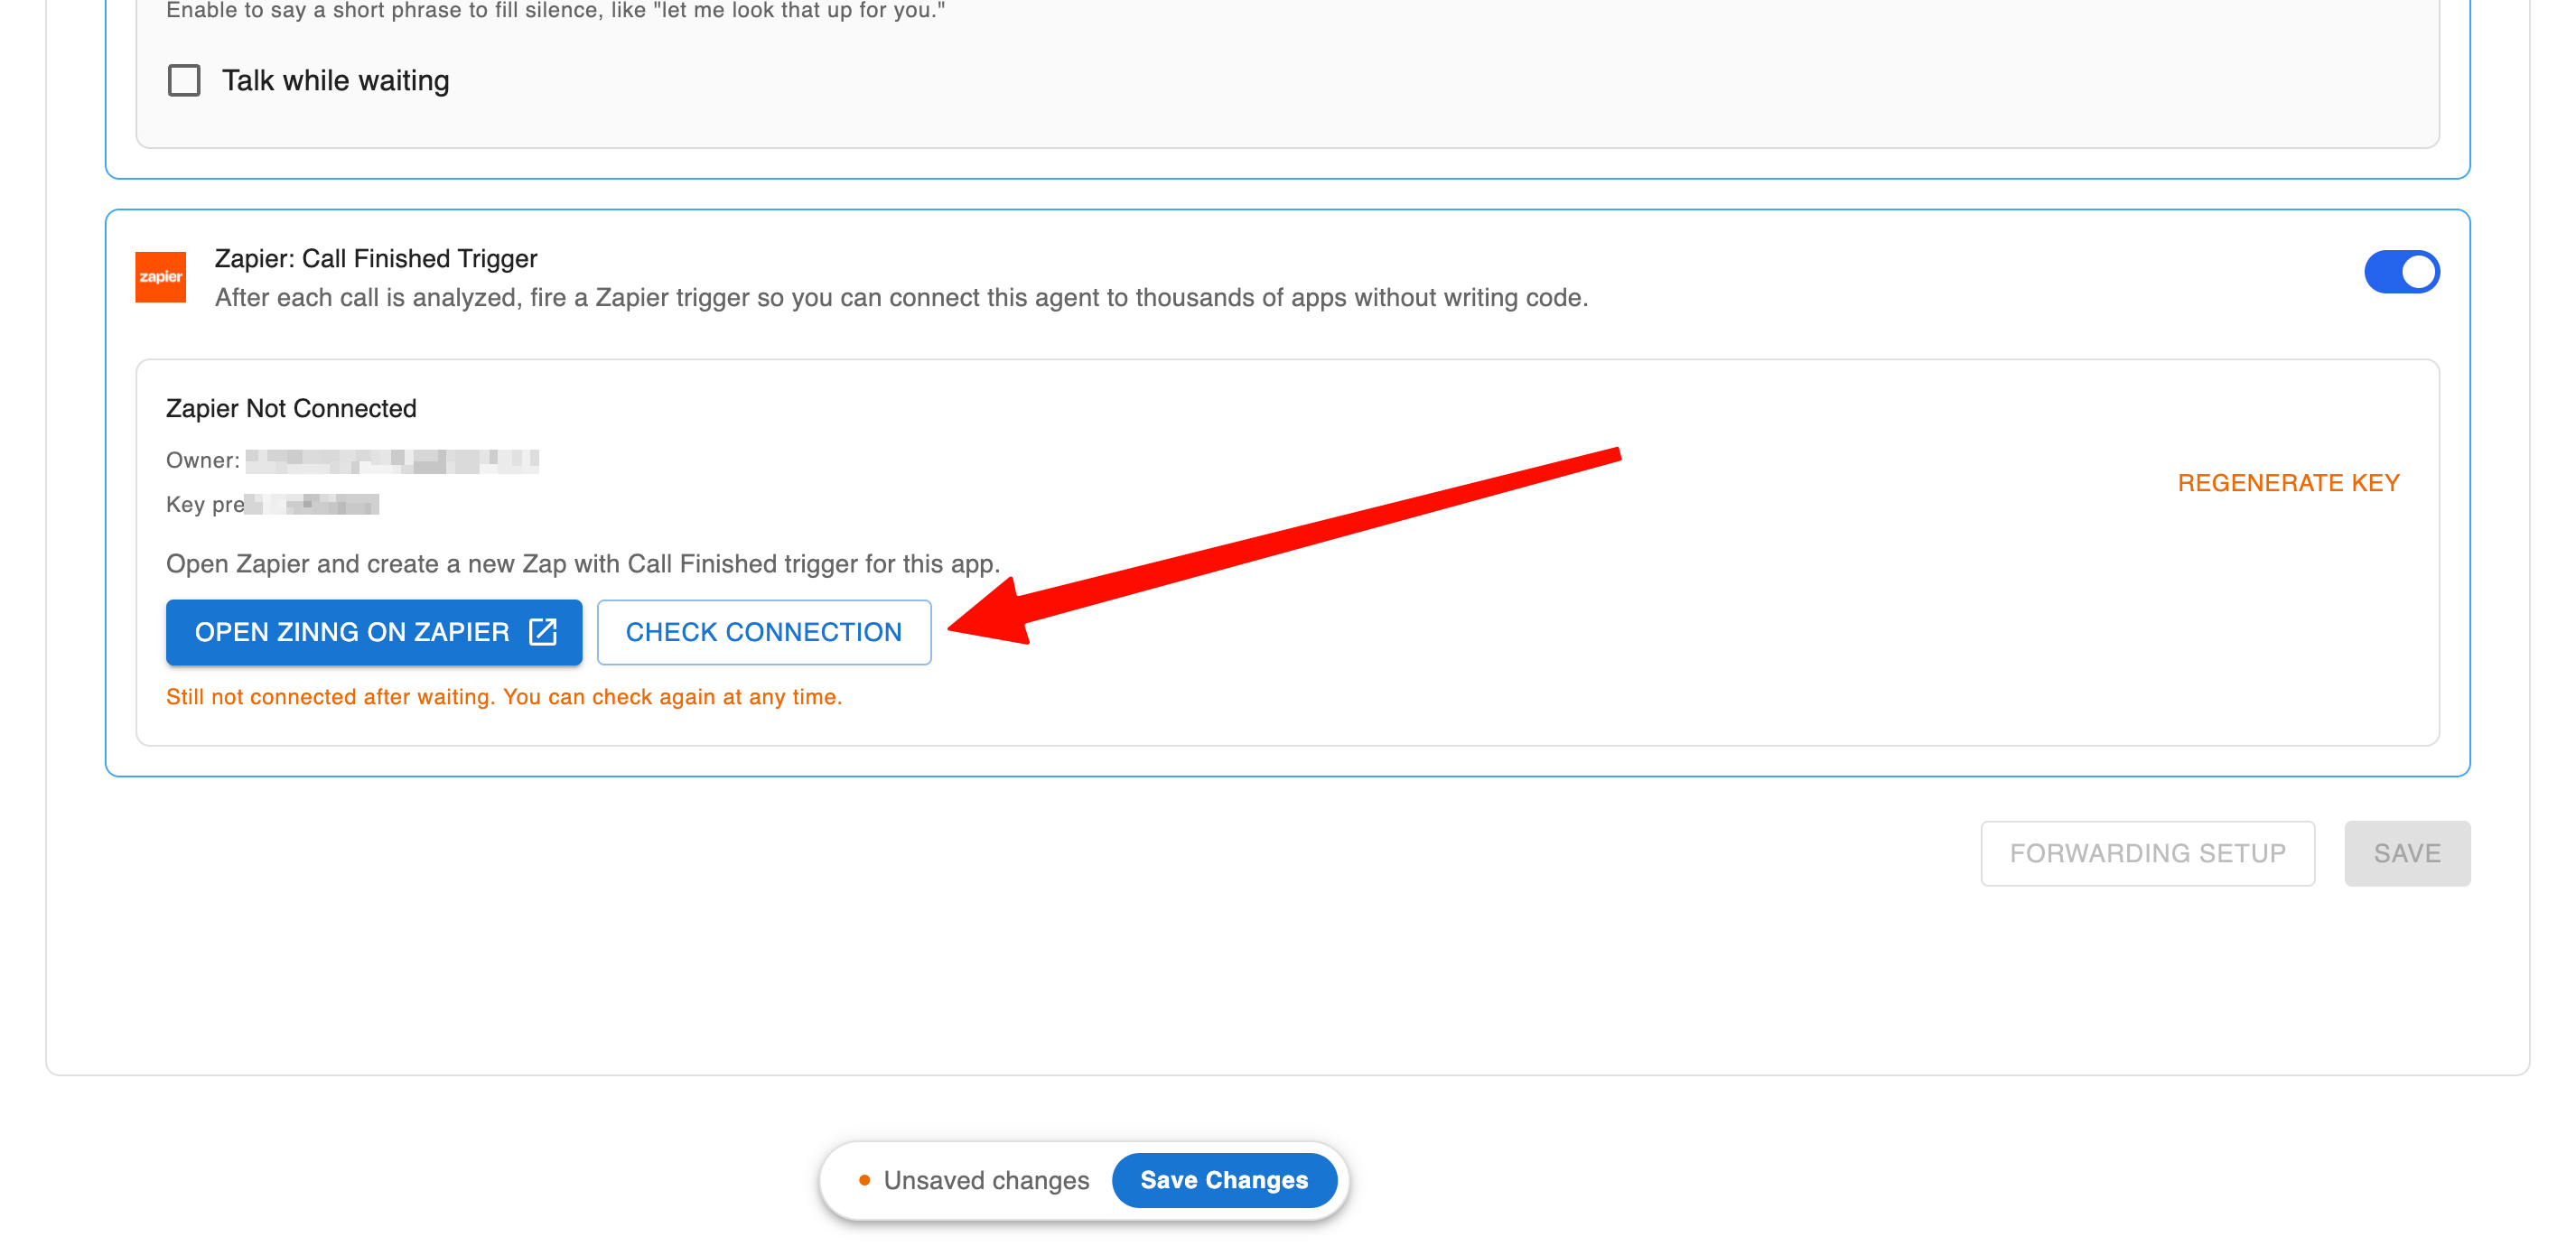
8. Back in Zinng, check the connection
Return to the Zapier: Call Finished Trigger add-on in your Zinng agent settings and click Check Connection. Now that your Zap is published, Zinng recognizes it and the agent shows as connected.
9. Choose the data Zinng sends (default and custom fields)
Once the connection check succeeds, Zinng reveals the data it can send to Zapier. At the top are the default fields that are always included, things like the caller's number, call duration, transcript, the AI call summary, and caller sentiment.
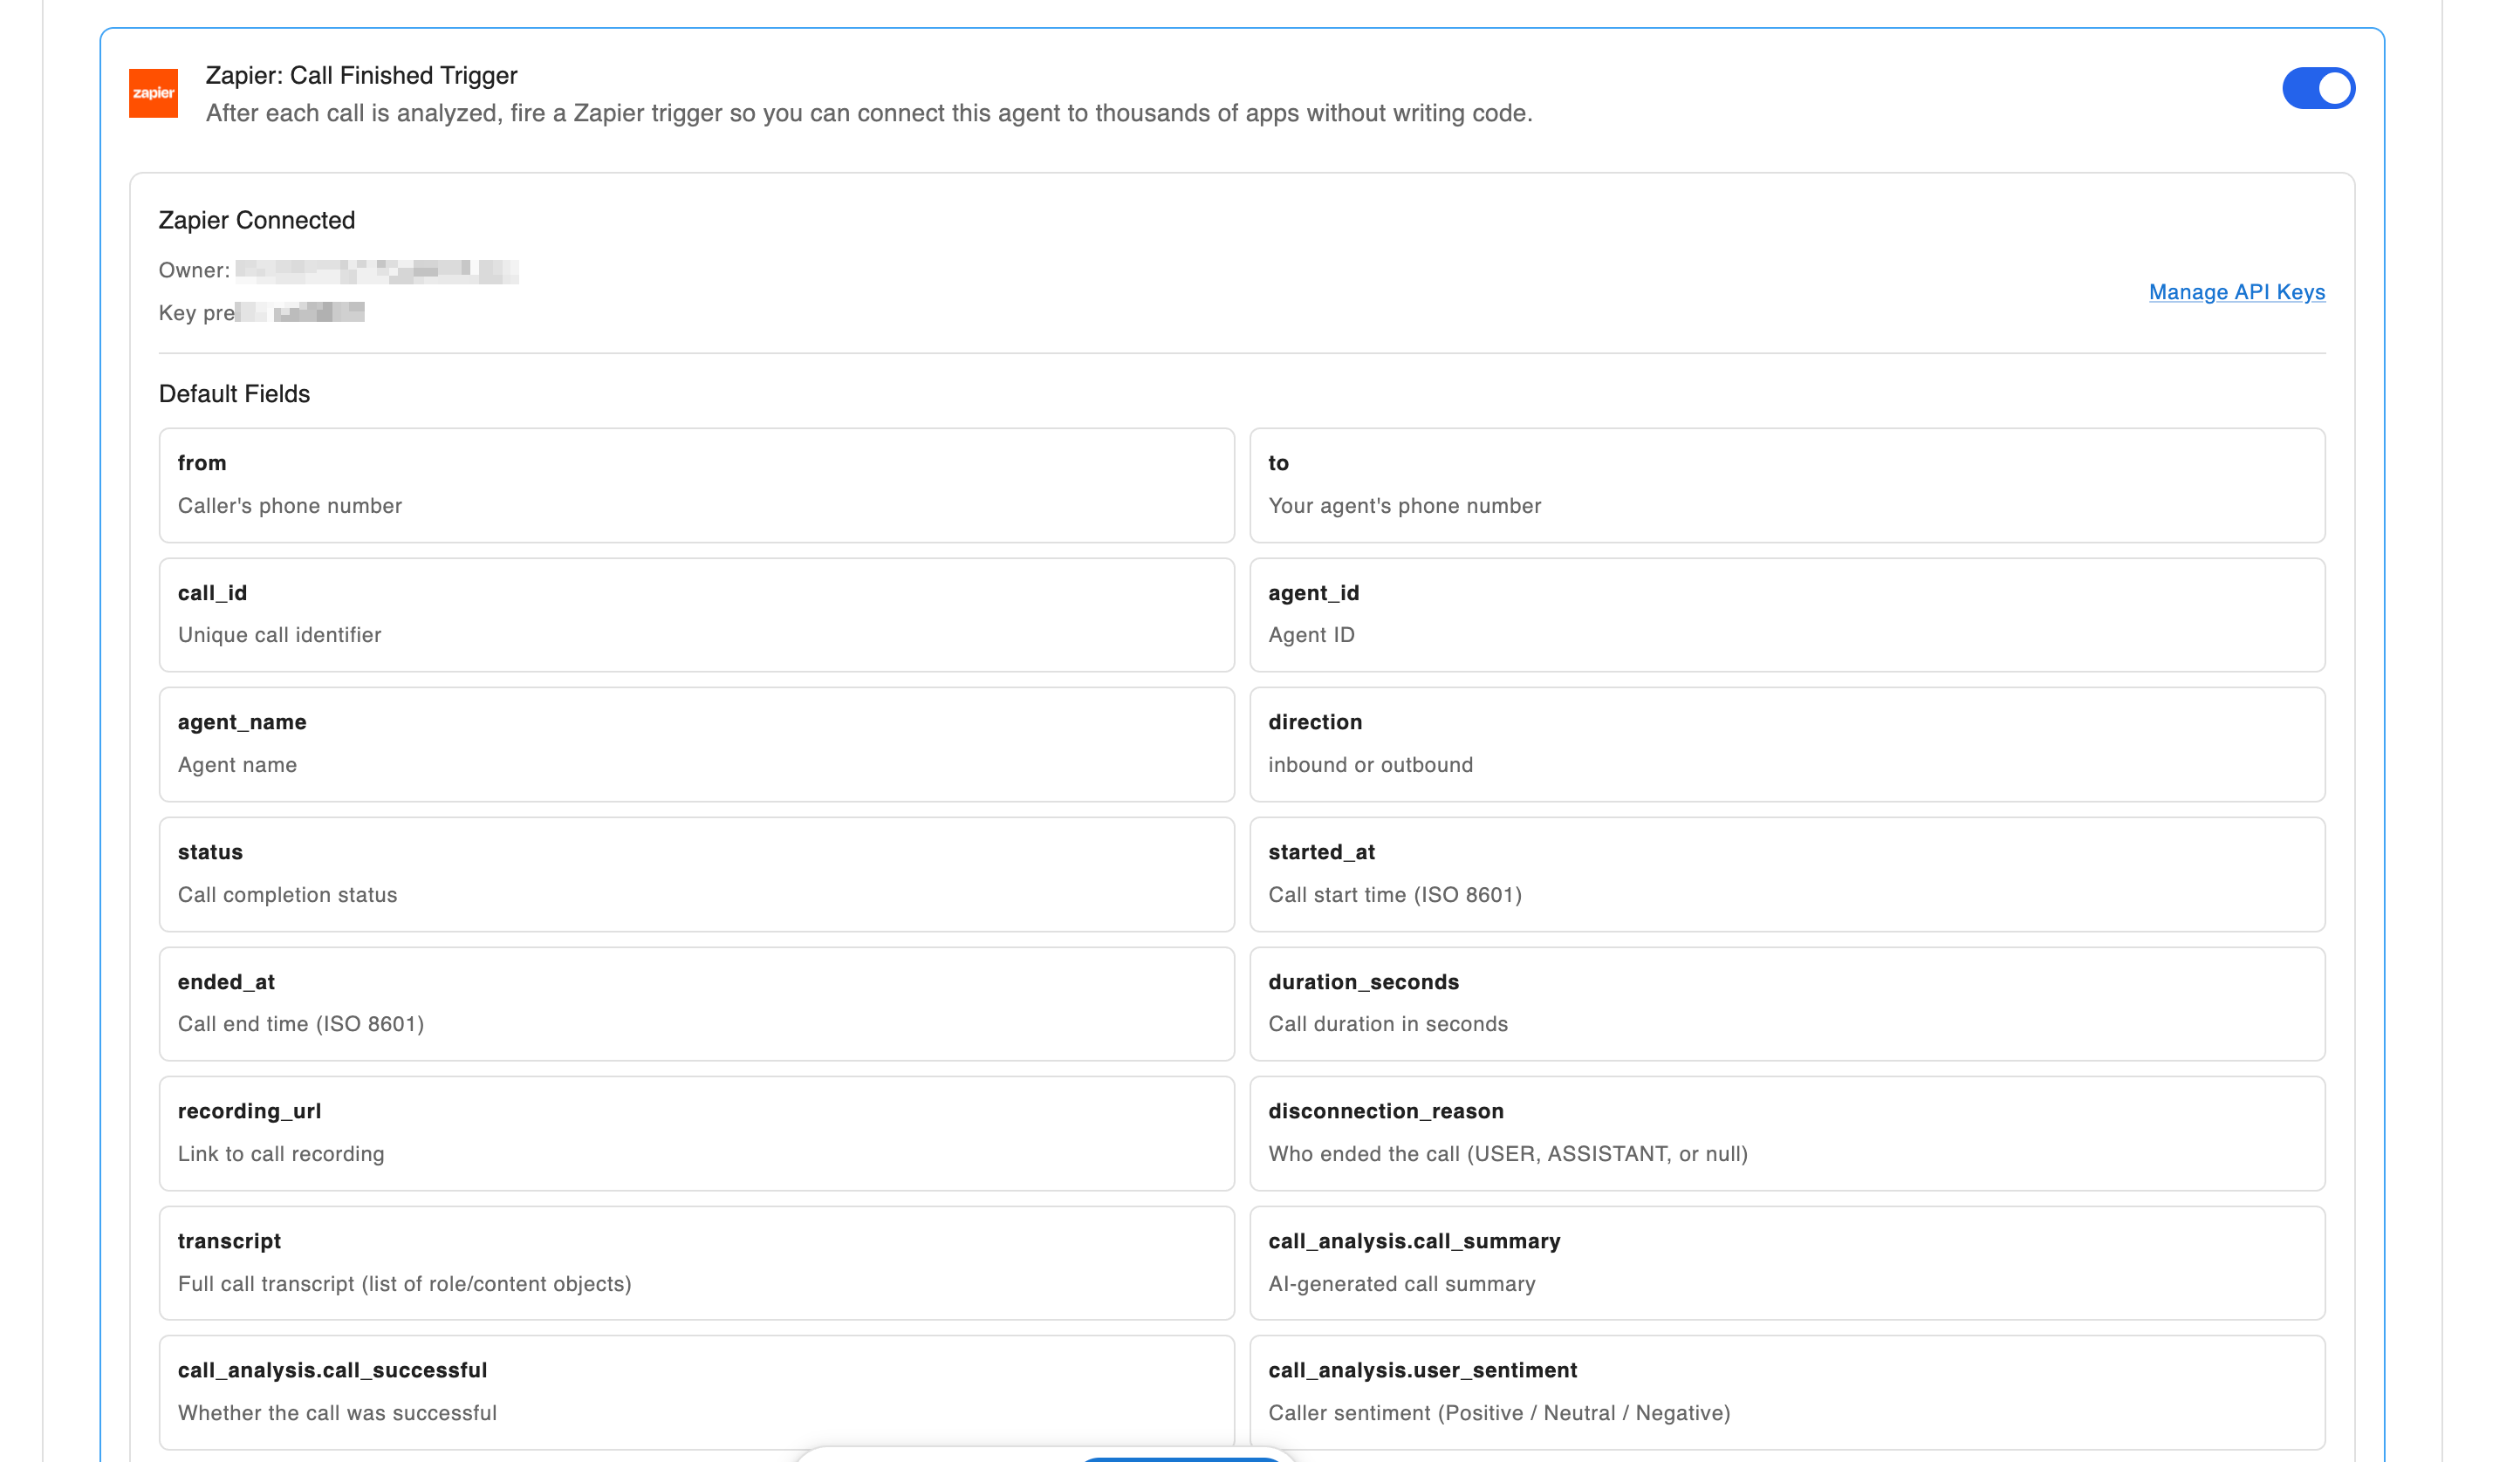
You can map any of these into Jotform. But for most Jotform forms you'll want your own custom extraction fields, specific pieces of information you want the AI to pull from each call's transcript and fill in for you (for example, the caller's first name, last name, and phone number).
Leave the Model Selector on the default gpt-5-mini, then use Add Field to define each custom field with a name and an example. After a call ends, Zinng's AI reads the transcript, fills these in, and sends them to Zapier alongside the default fields. Click Save when you're done.
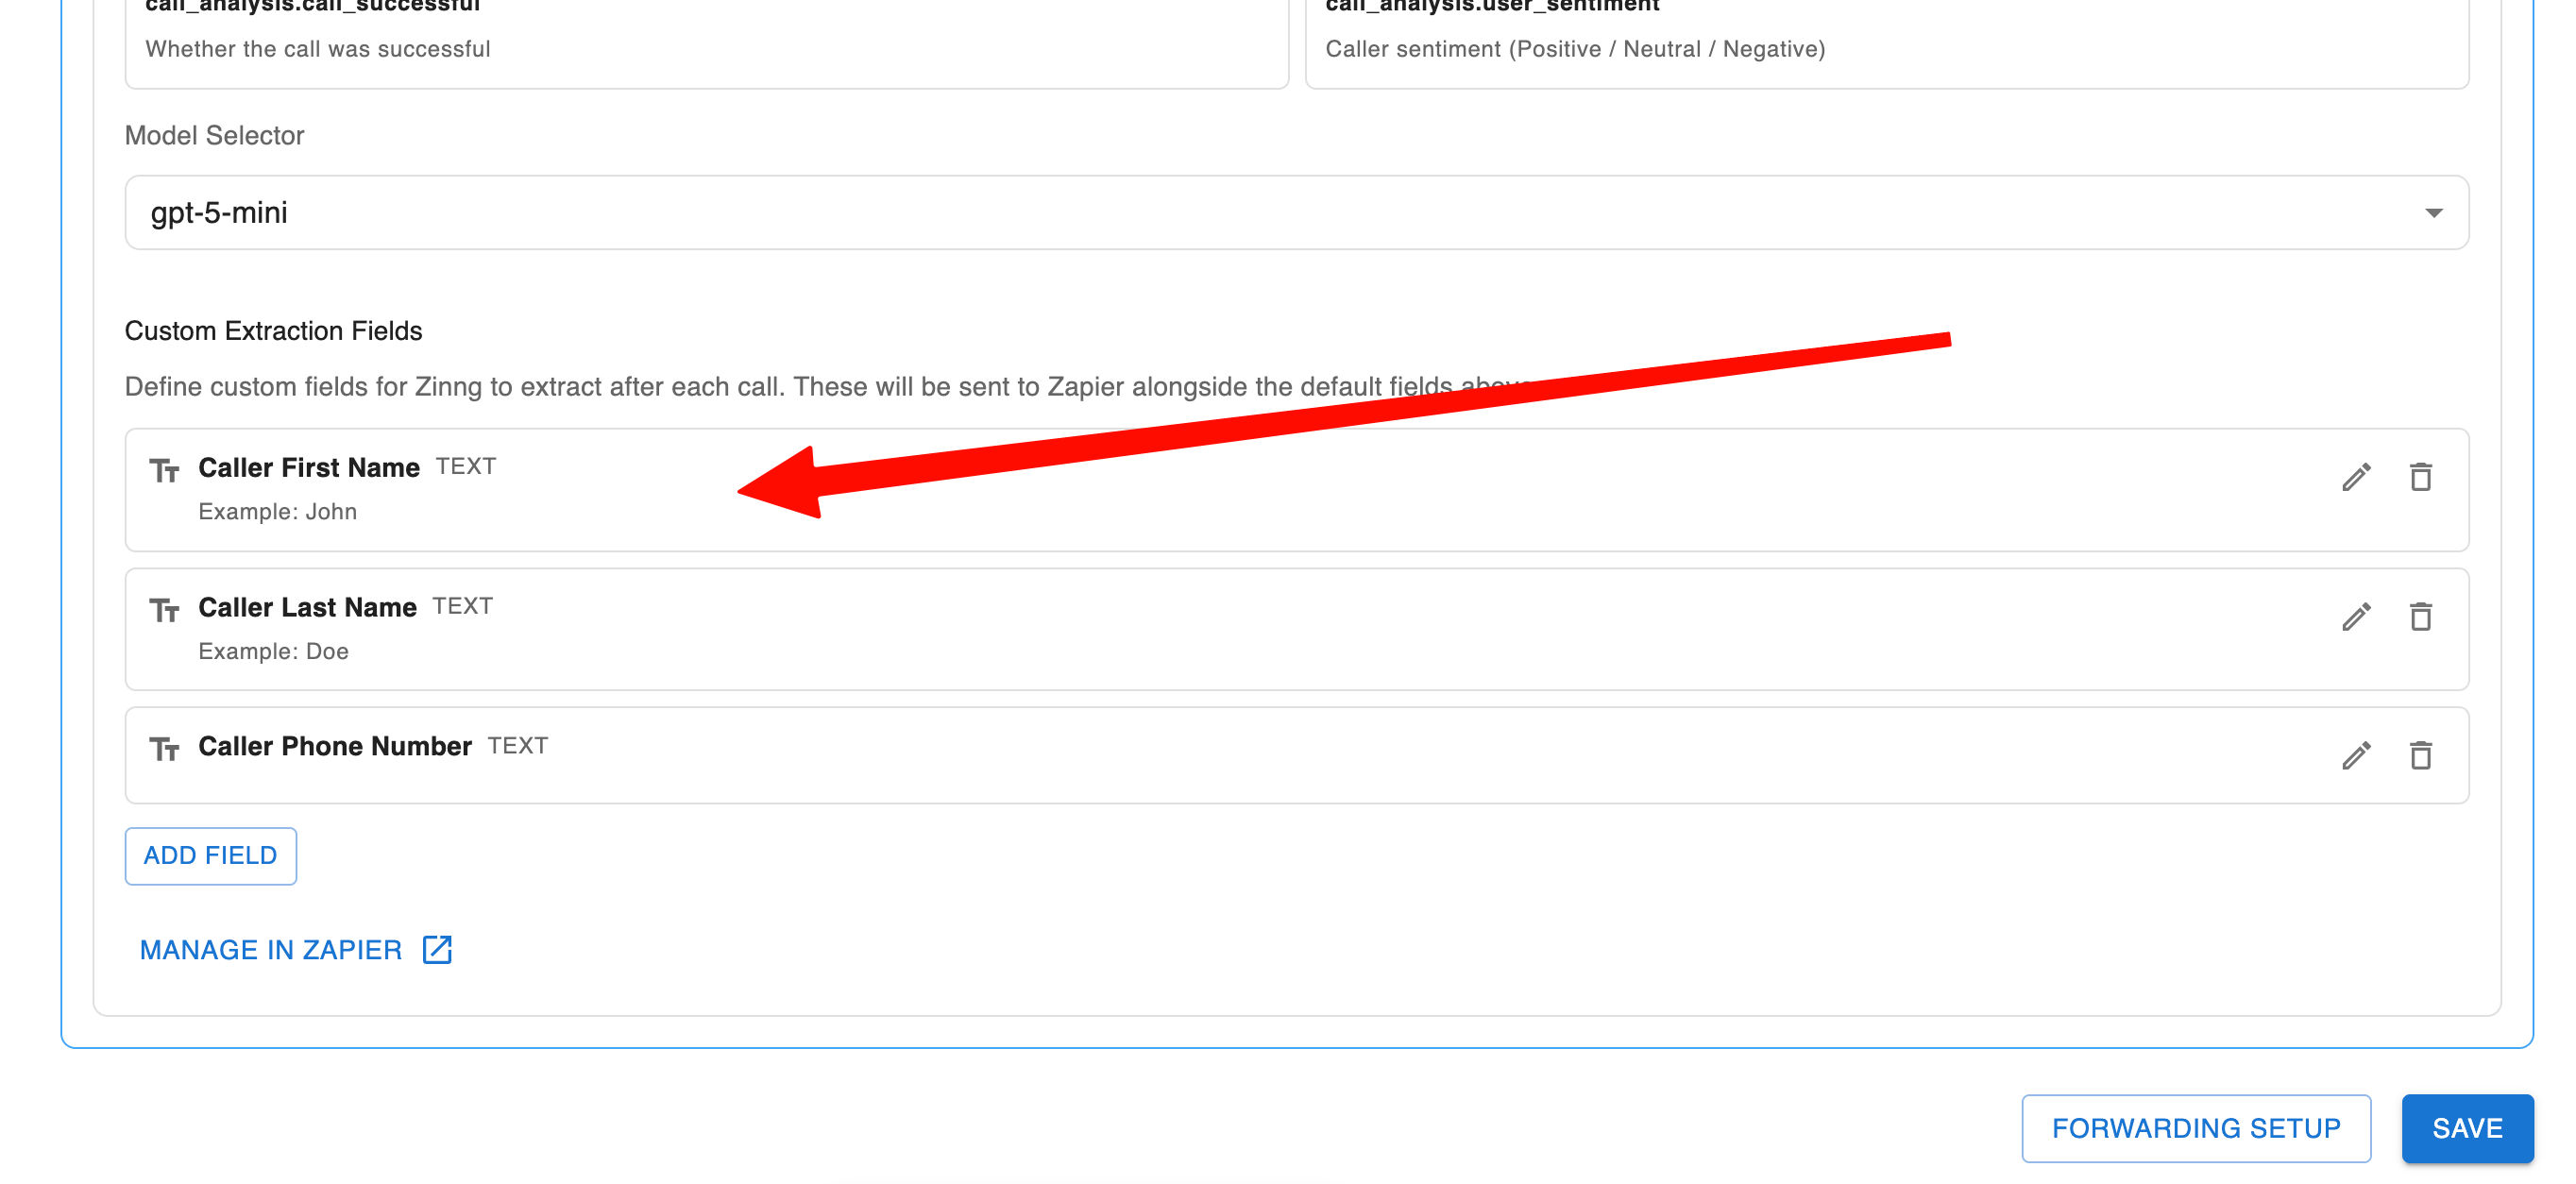
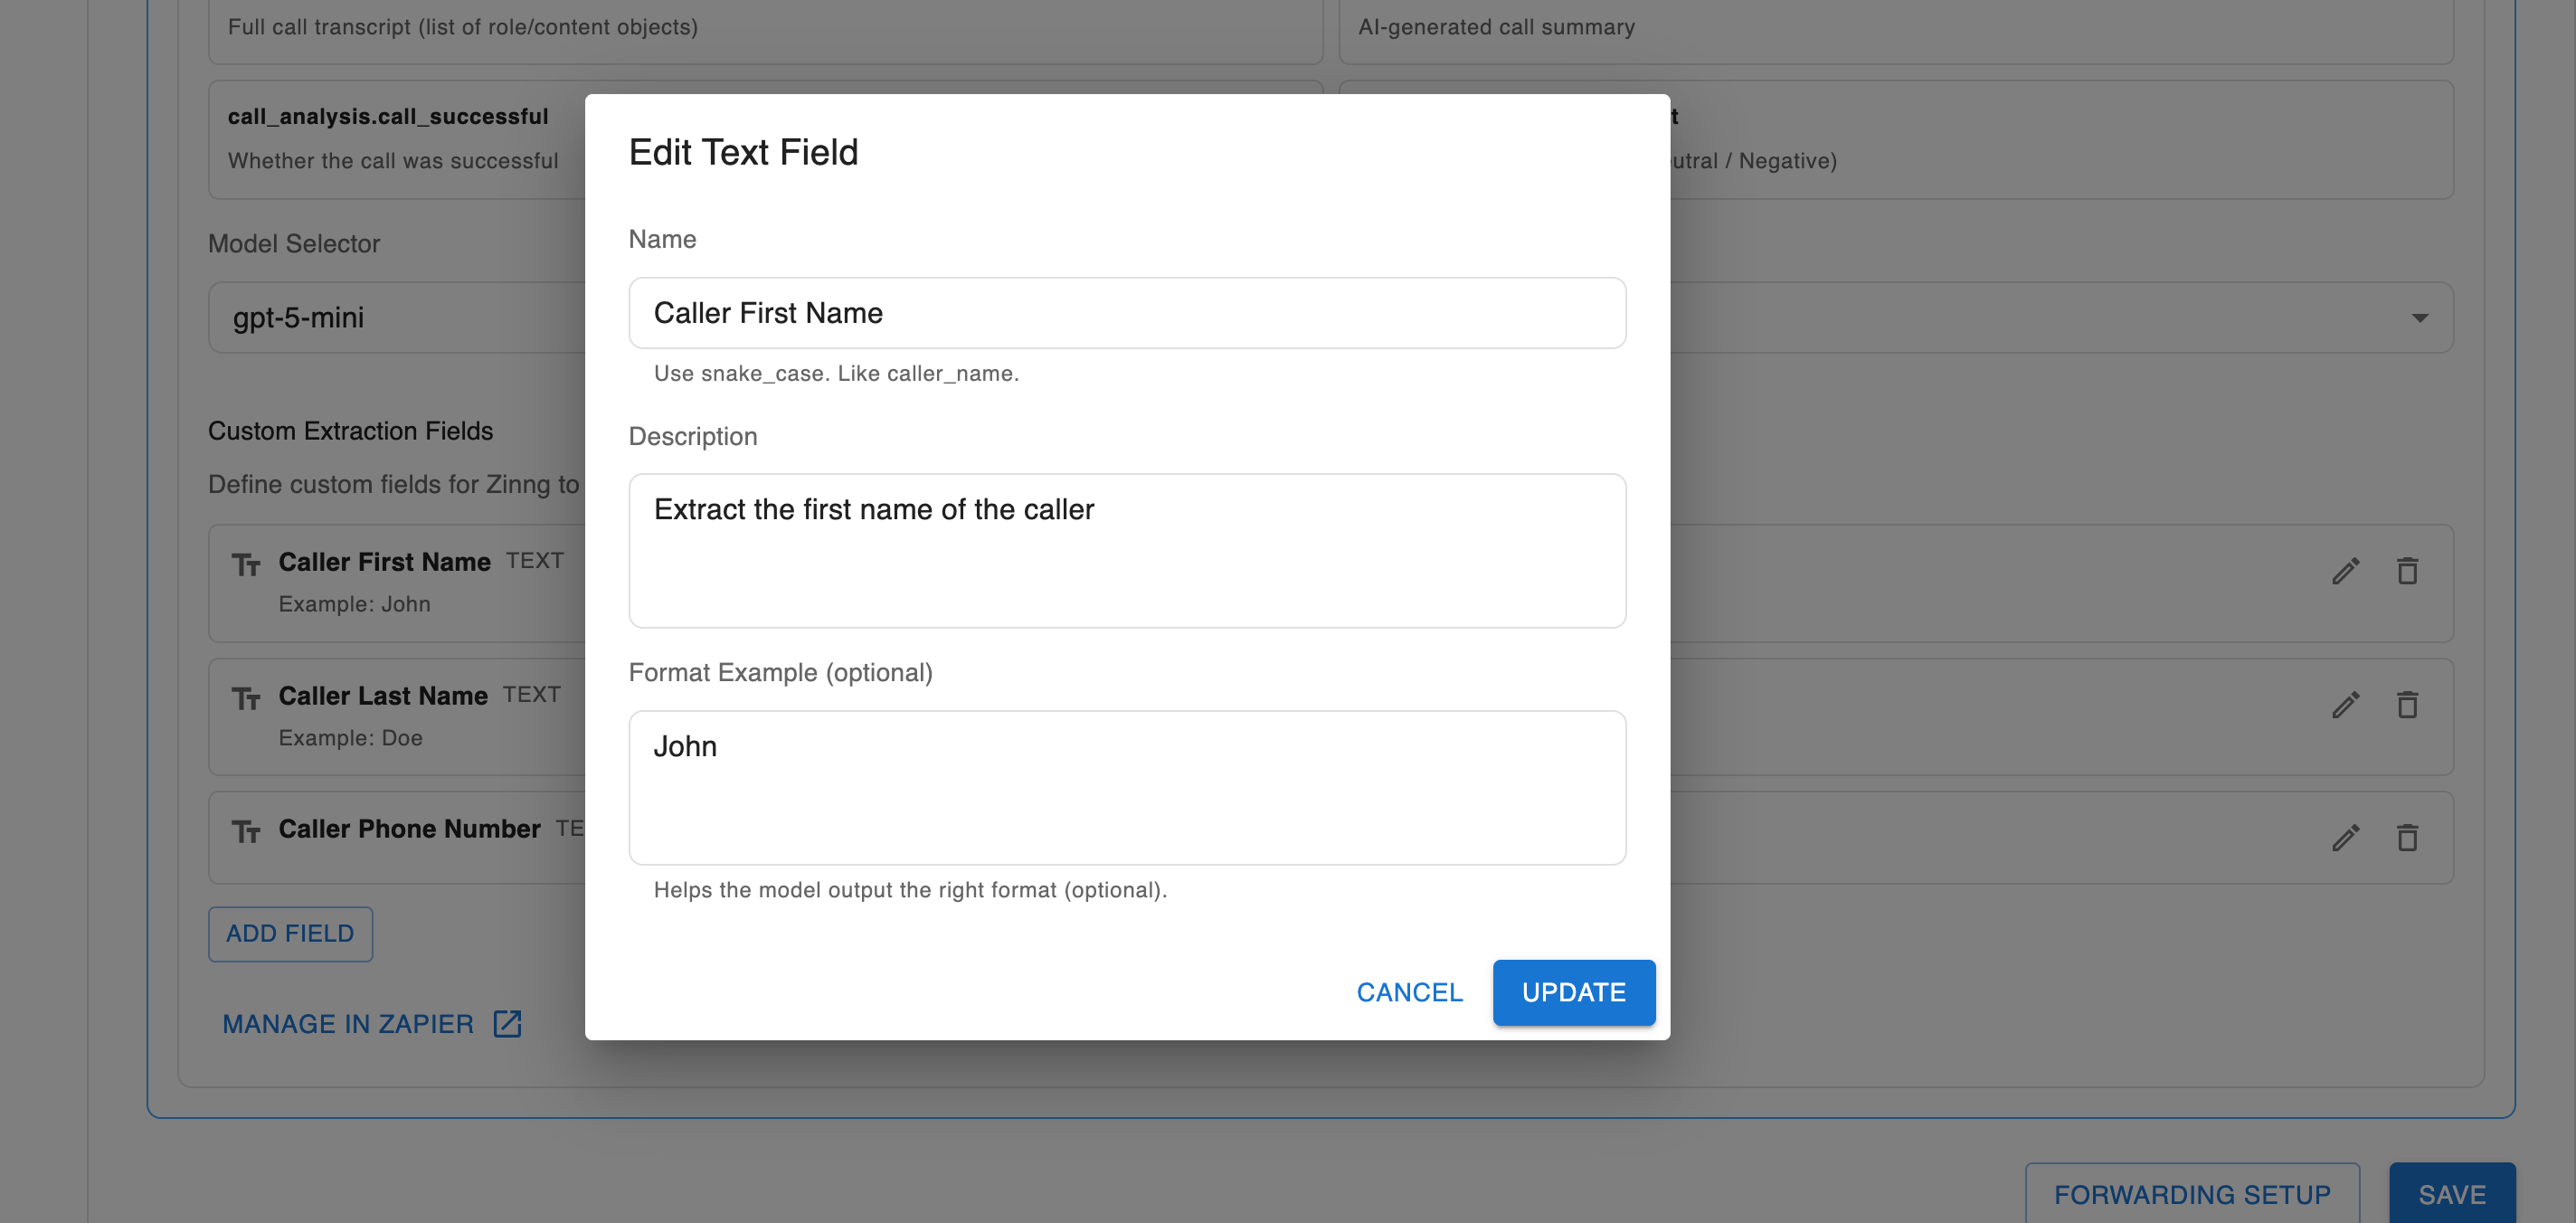
When you add or edit a field, you give it a name, a description of exactly what you want the AI to pull from the call, and an optional example to guide the format. That description is how you tell the AI what to analyze and extract.
10. Save and make a test call
Click Save to save the custom fields to your agent. Then place a real test call to your agent and have a short conversation, for example, ask it to take a message. Be sure to actually say the information your custom fields are set up to extract, for example, give a first name, last name, and phone number (fake details are fine), since the AI can only extract what it hears on the call. When the call ends, Zinng analyzes it, fills in your custom fields, and sends everything to Zapier through the Call Finished trigger. This is what gives Zapier a real data sample with your custom fields, which you'll use to finish the Jotform step.
11. Find your test call in Zap Runs
Give it a few seconds after the call ends, then in Zapier open Zap Runs (the clock icon in the left sidebar) and click the refresh icon. Your test call shows up as a successful run, this is the real data that just came into Zapier from your agent.
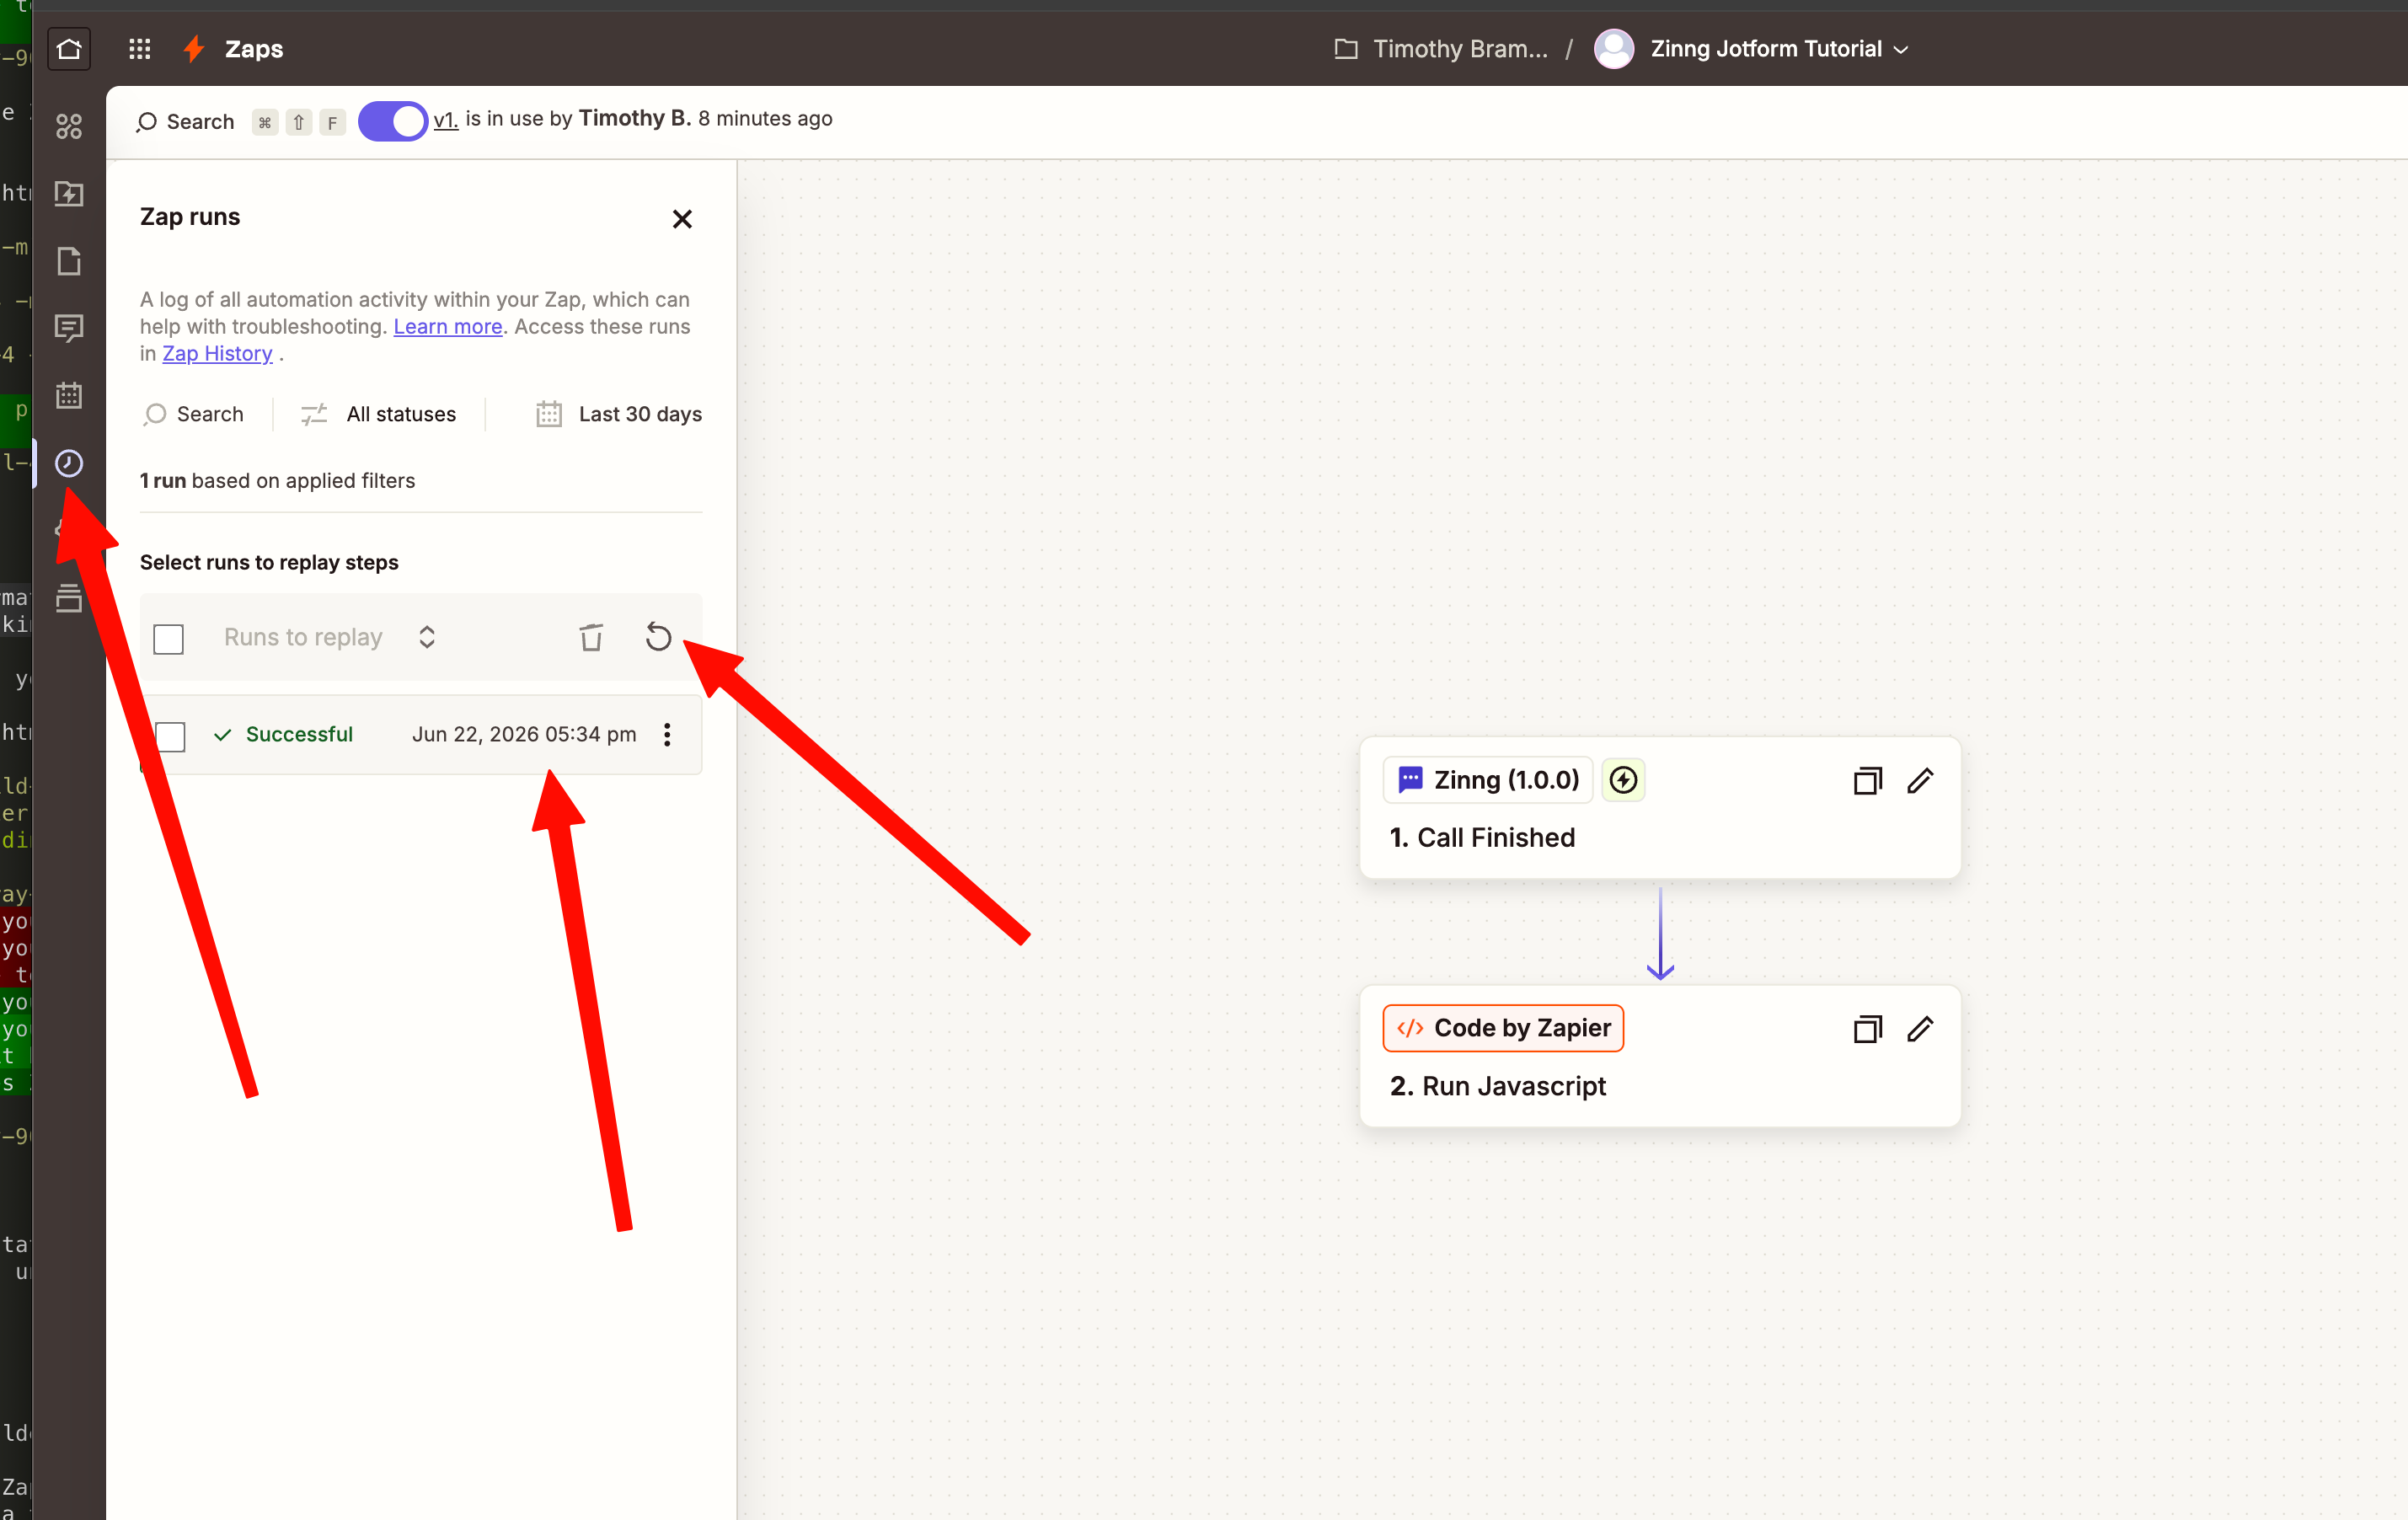
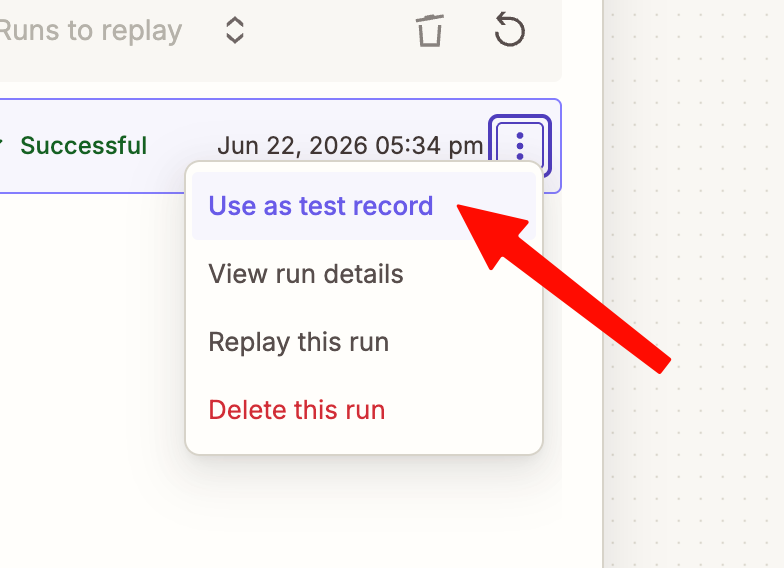
On that successful run, click the three-dot menu and choose Use as test record. This loads the real call, with your custom fields, as the trigger's sample, so those fields become available to map into Jotform in the next step.
Then click Edit Zap to go back into the Zap editor.
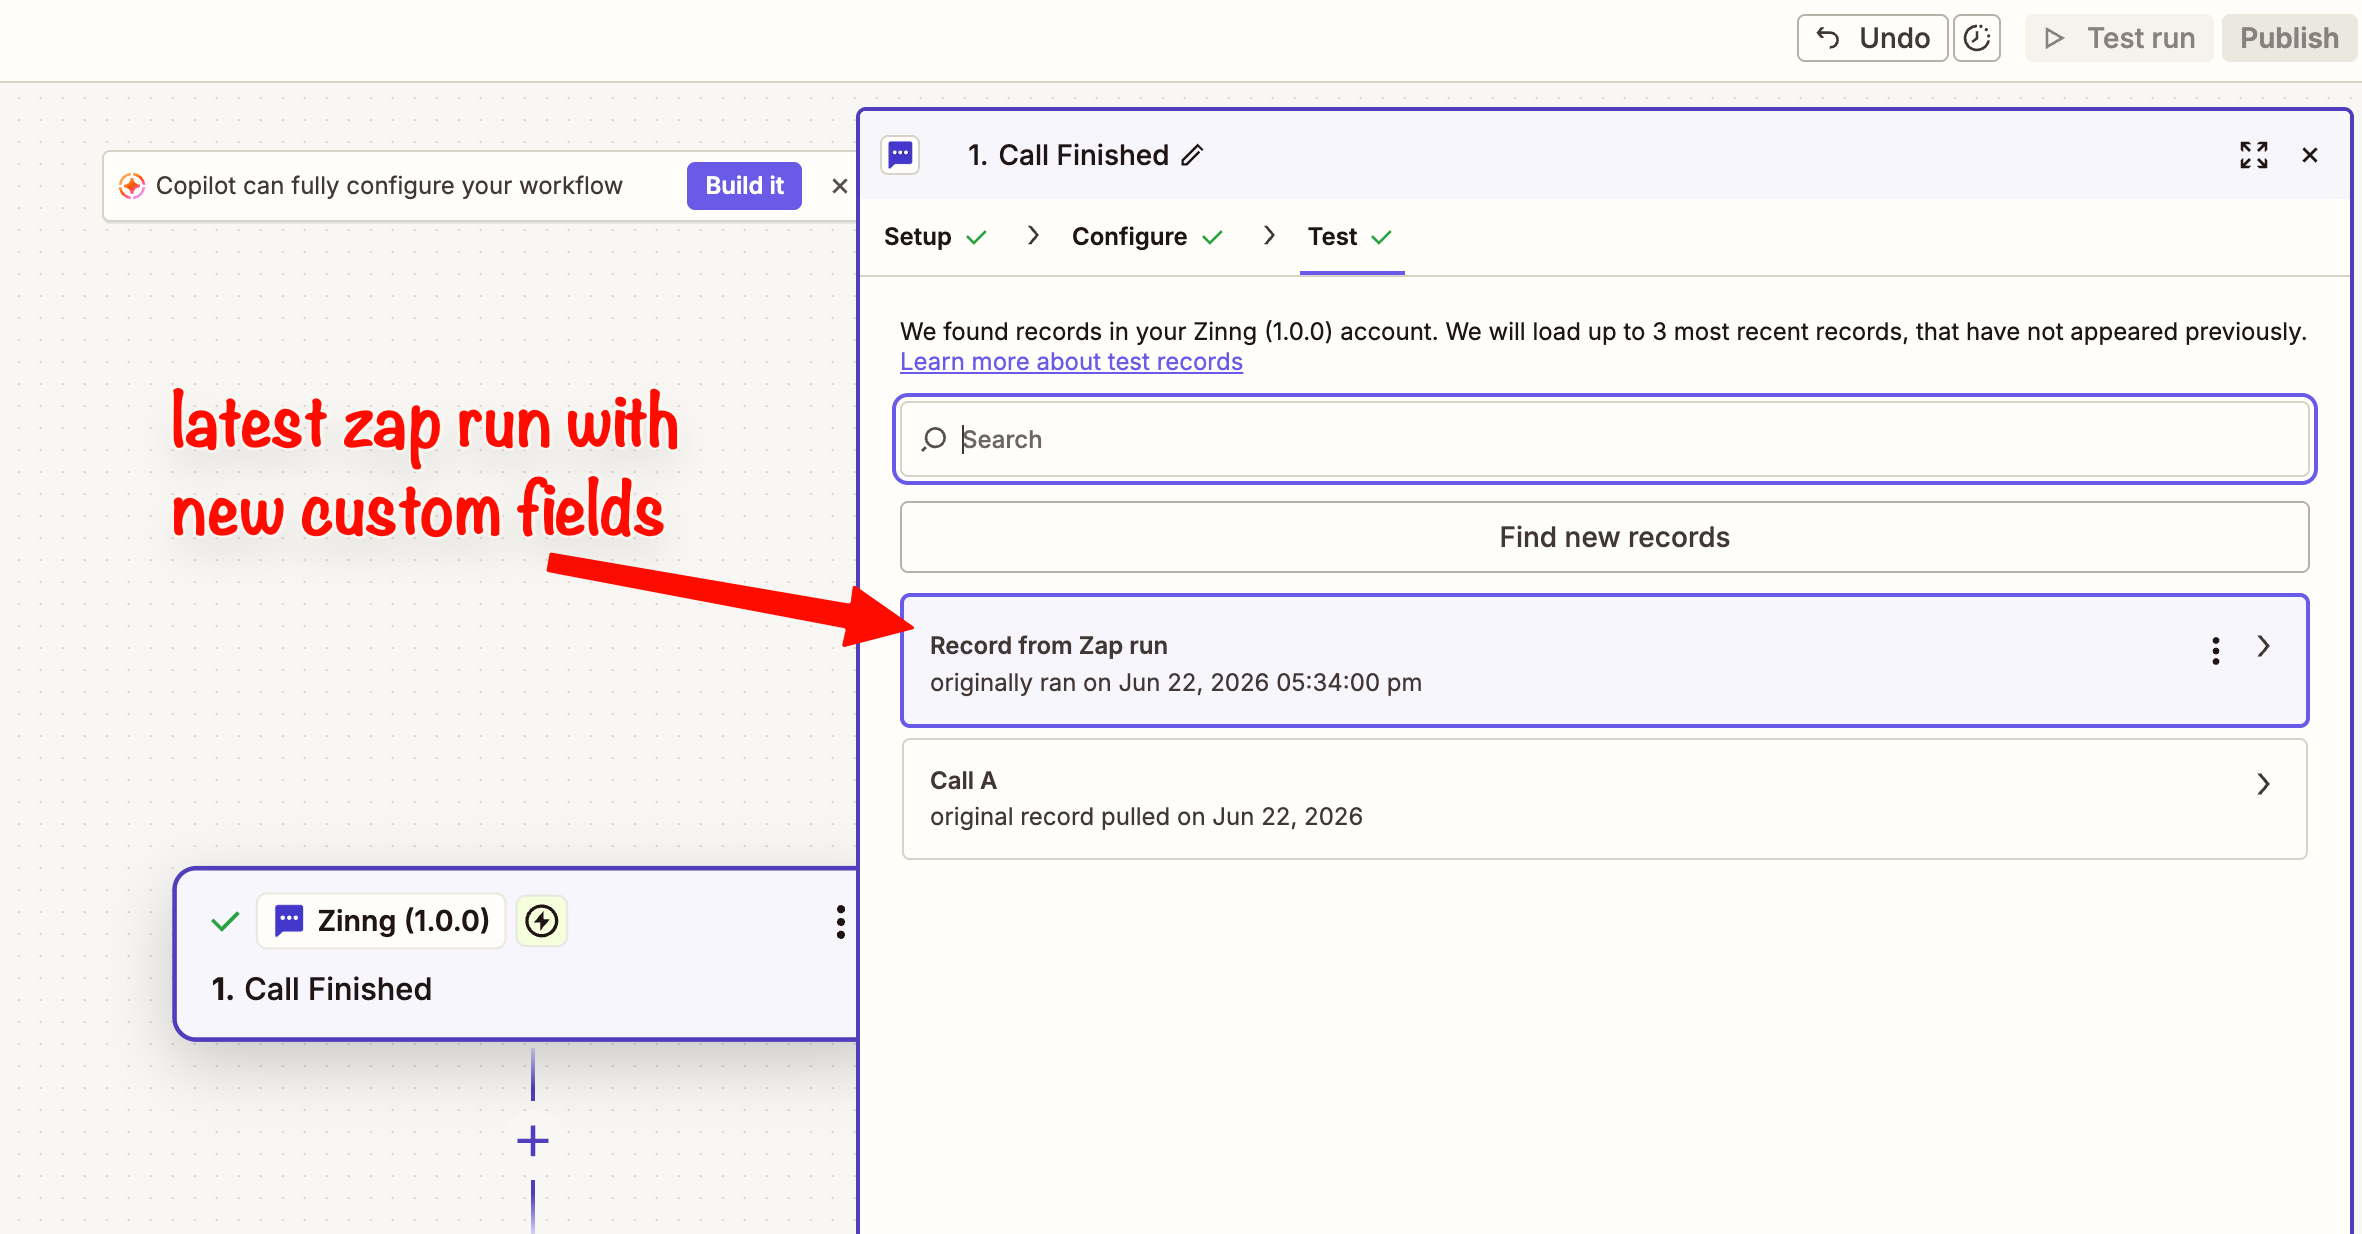
One more thing before you add Jotform: click the Call Finished trigger step, open its Test tab, and select the record you just added, the one labeled Record from Zap run (it has your new custom fields). Click Continue with selected record. This refreshes the trigger's output so the custom fields you defined in Zinng are available to map.
12. Swap in the Jotform action
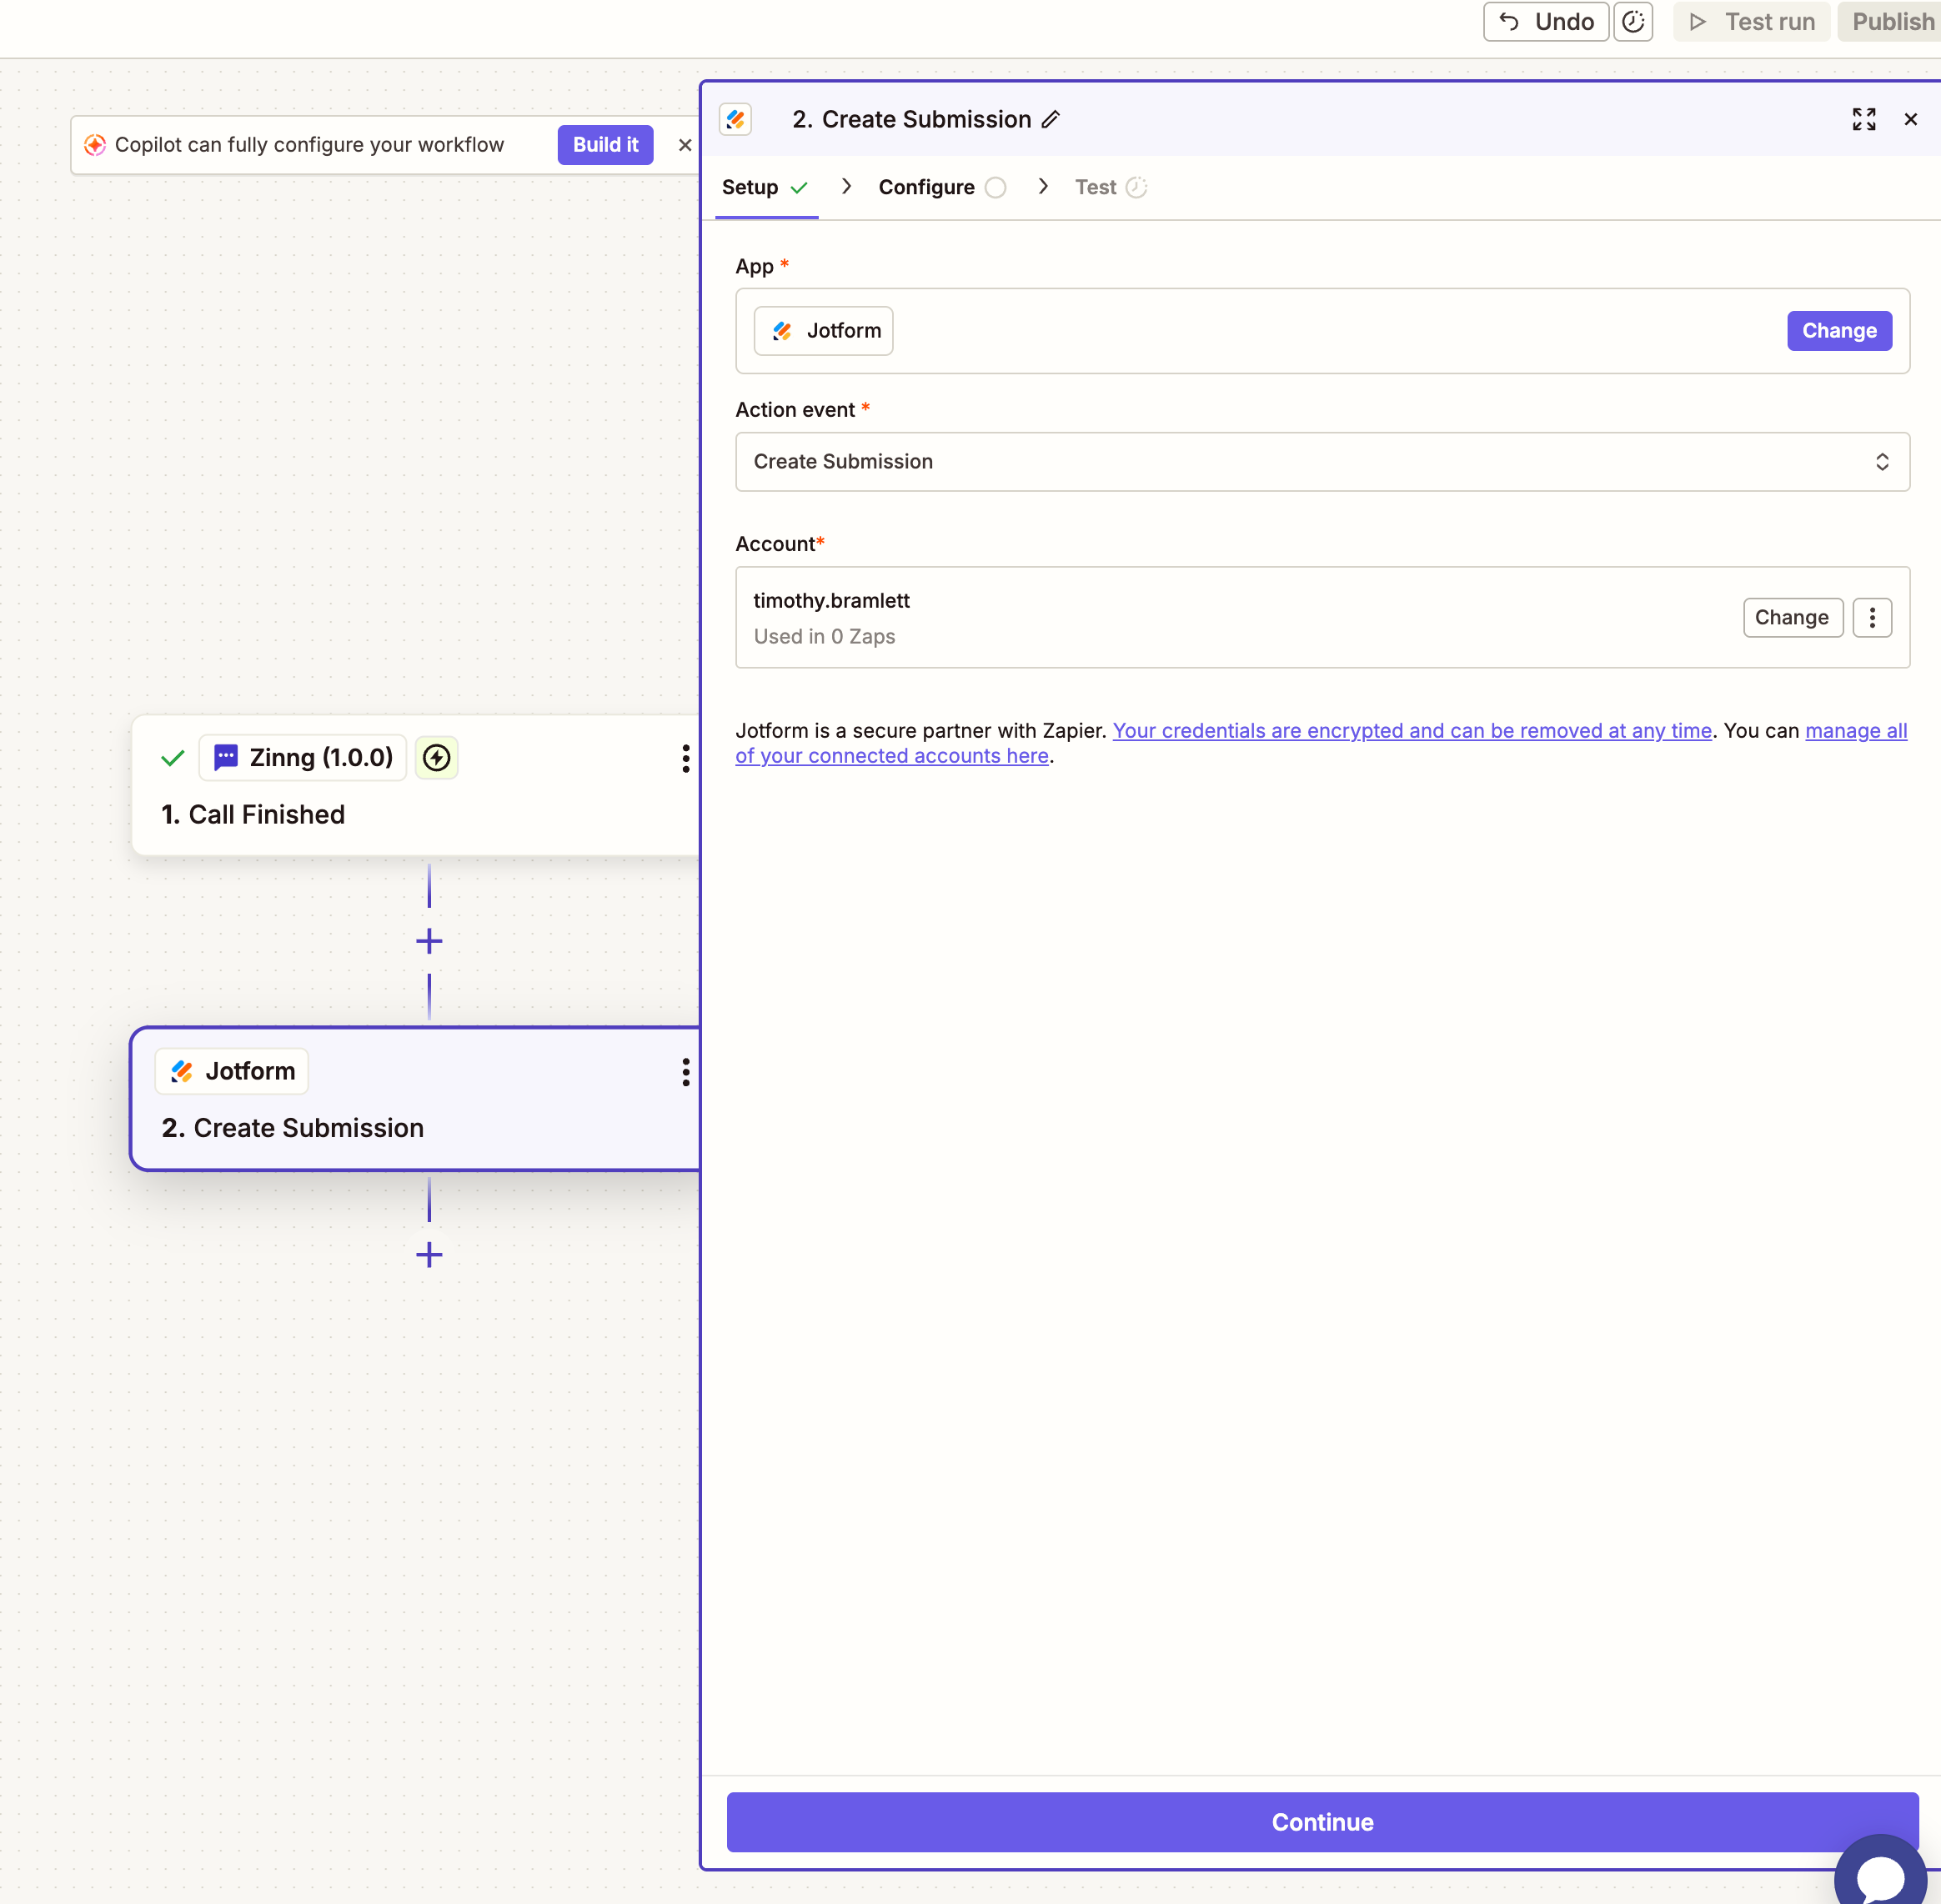
Now that Zapier has a real call to work with, delete the Code by Zapier (Run Javascript) placeholder step, you don't need it anymore. Then add a new action step and choose the app you actually want to connect to. The Zinng trigger works with any of Zapier's thousands of apps, but for this tutorial that's Jotform.
Select Create Submission as the action event, connect your Jotform account (a quick sign-in), then click Continue.
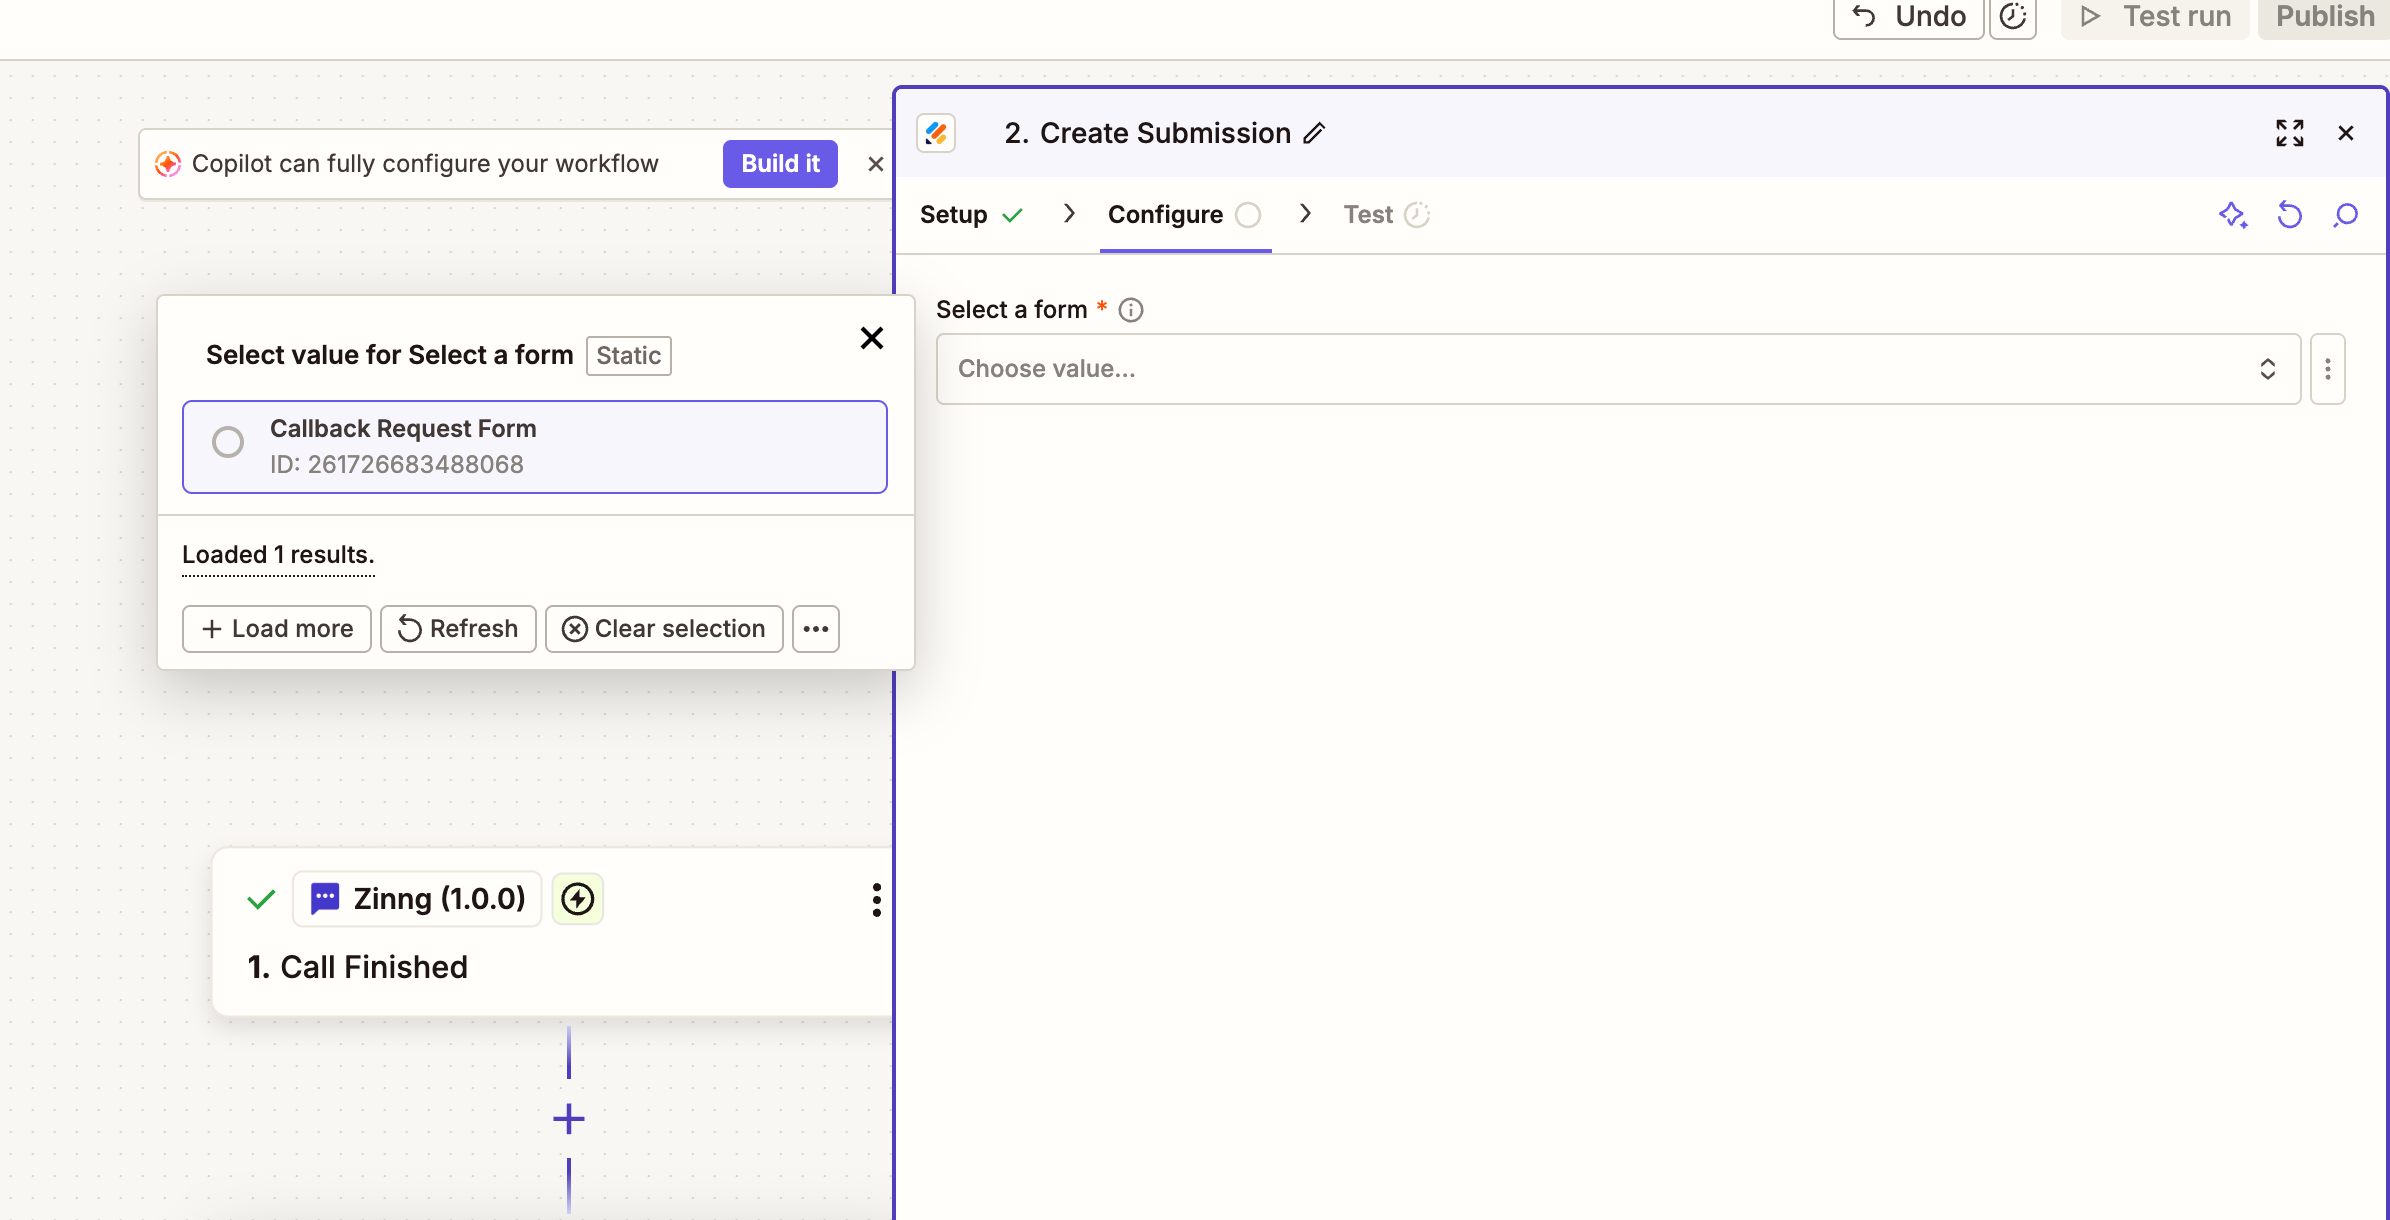
13. Select your Jotform form
On the Configure tab, open the Select a form dropdown and choose the Jotform form you want submissions created in. In this example it's a form called "Callback Request Form", yours will be whatever form you've built.
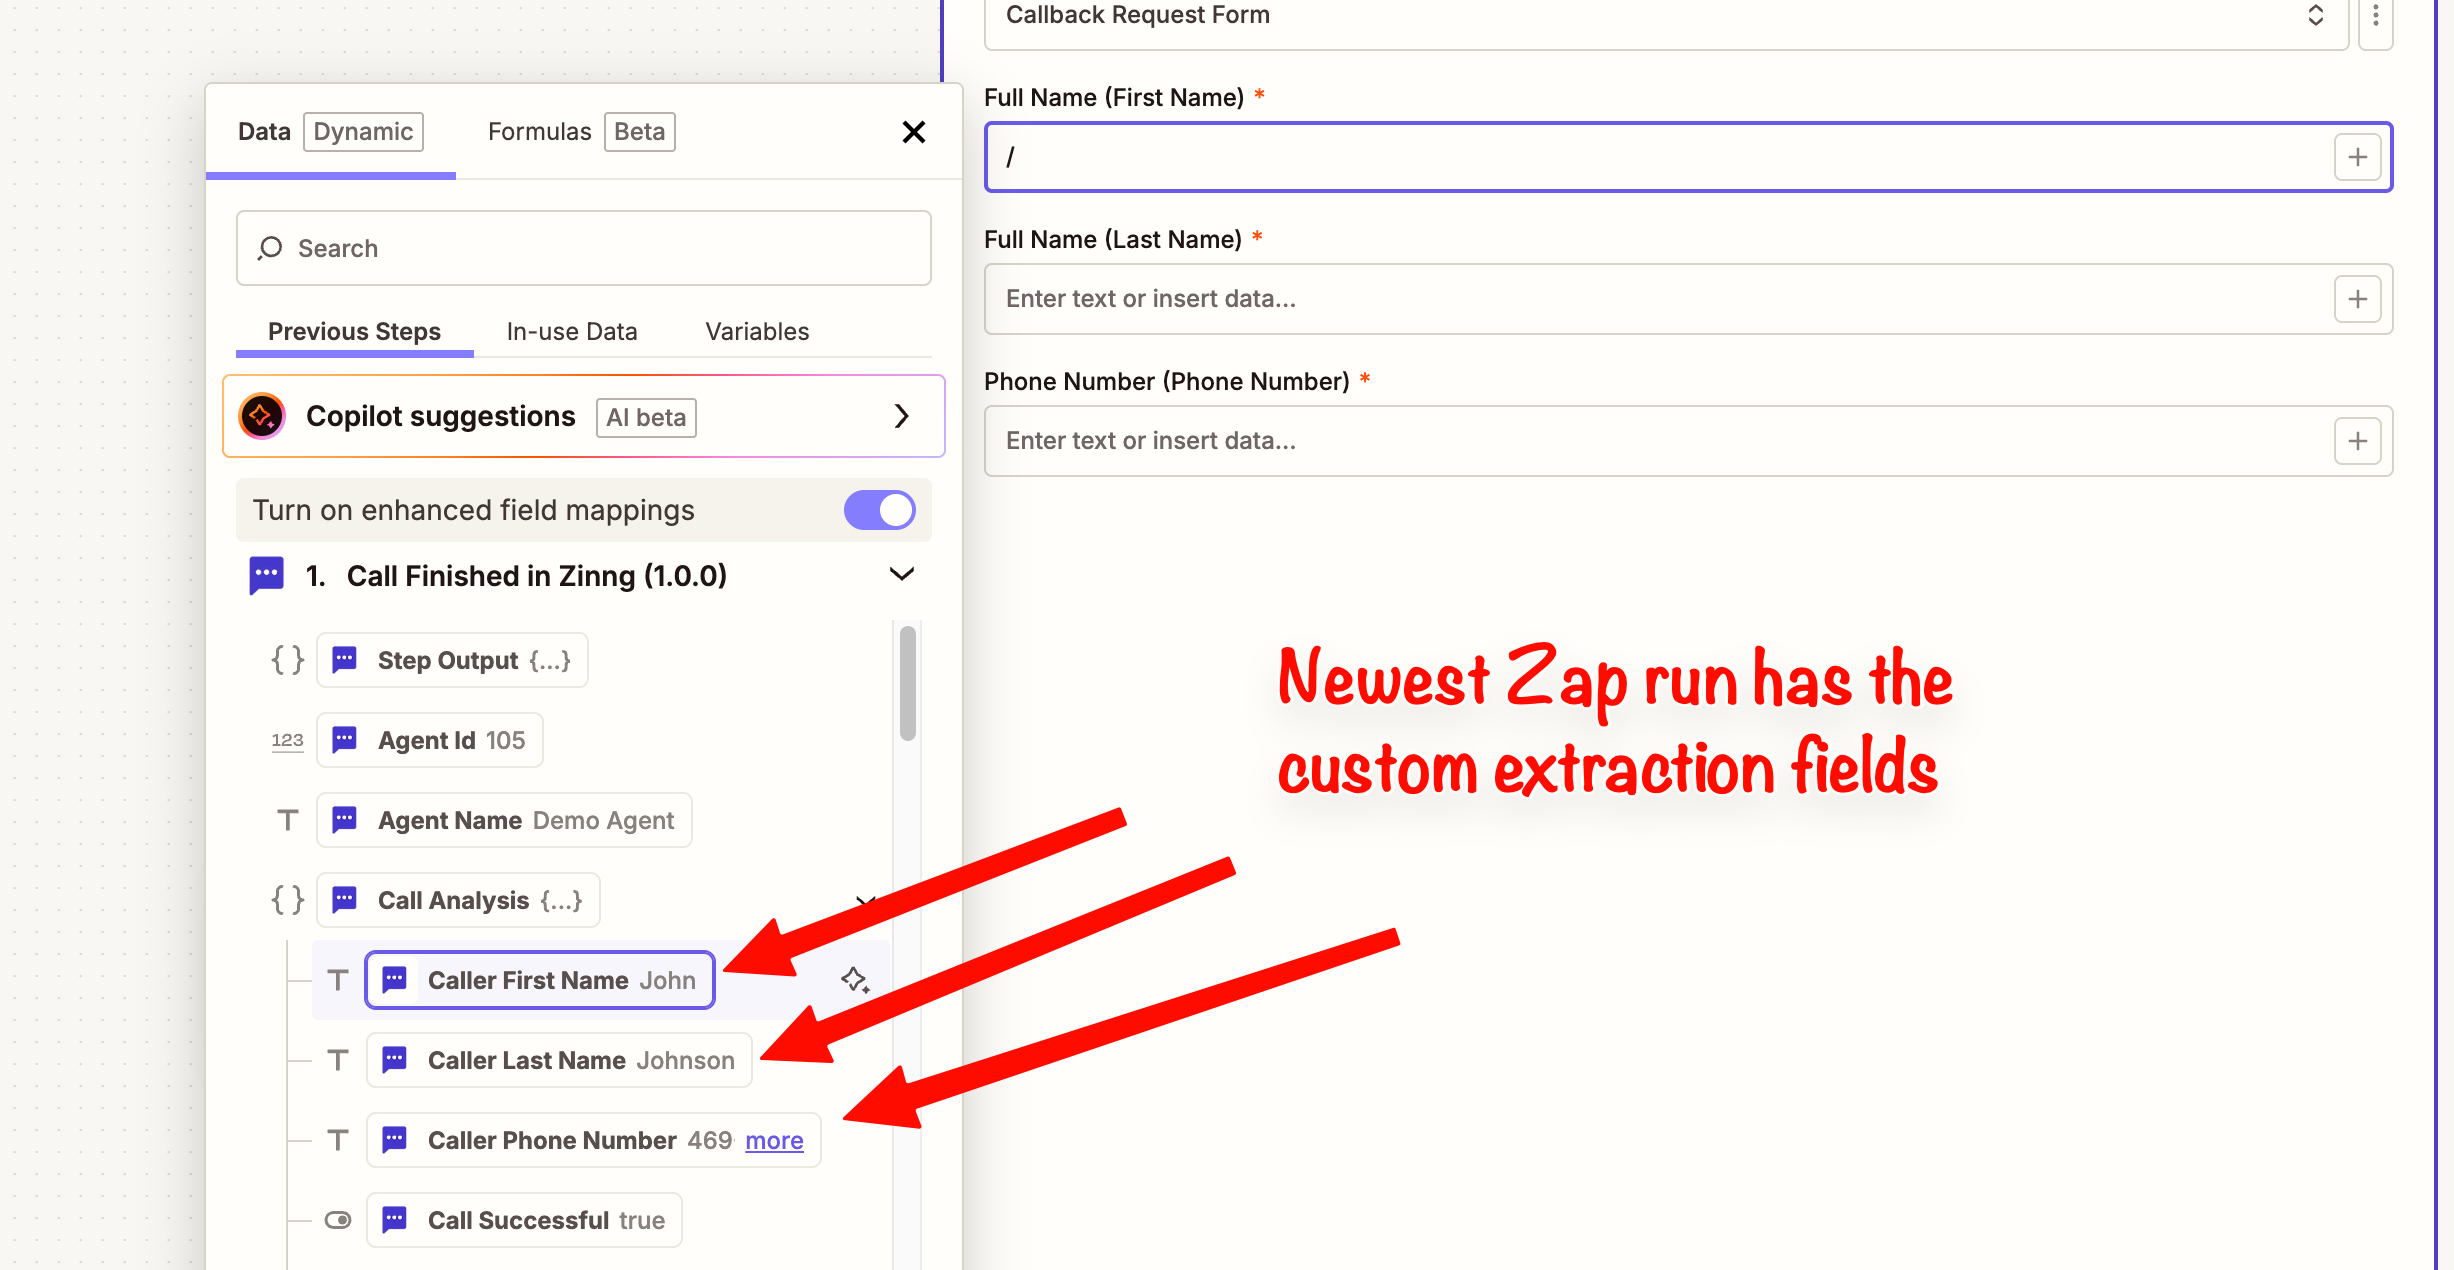
14. Map the call data to your form fields
Now match each field on your Jotform form to the data from the call. Click into a form field and pick the matching value from the Call Finished trigger data. Because you selected the latest run, your custom extraction fields are right there, for example, map the form's First Name to Caller First Name, Last Name to Caller Last Name, and Phone Number to Caller Phone Number. You can also drop in any of the default fields (the call summary, transcript, recording link, and so on) wherever they fit.
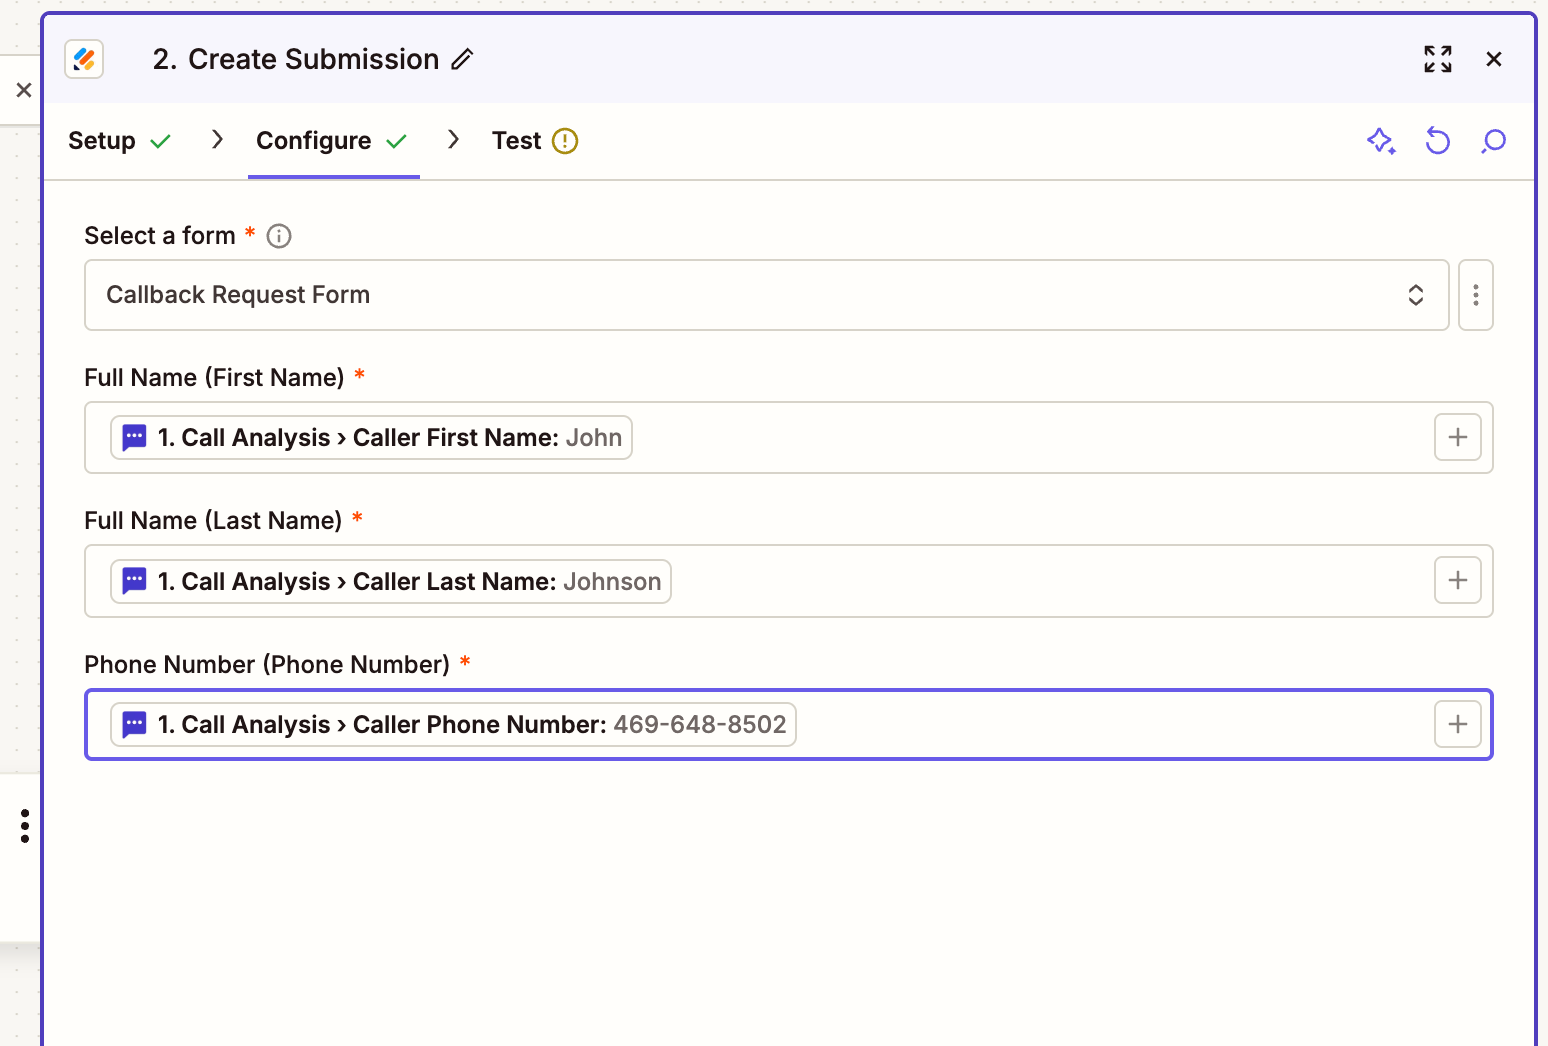
When you're done, each required field on your form is filled with the matching call data, like this, adjusted, of course, to whatever fields your own form collects.
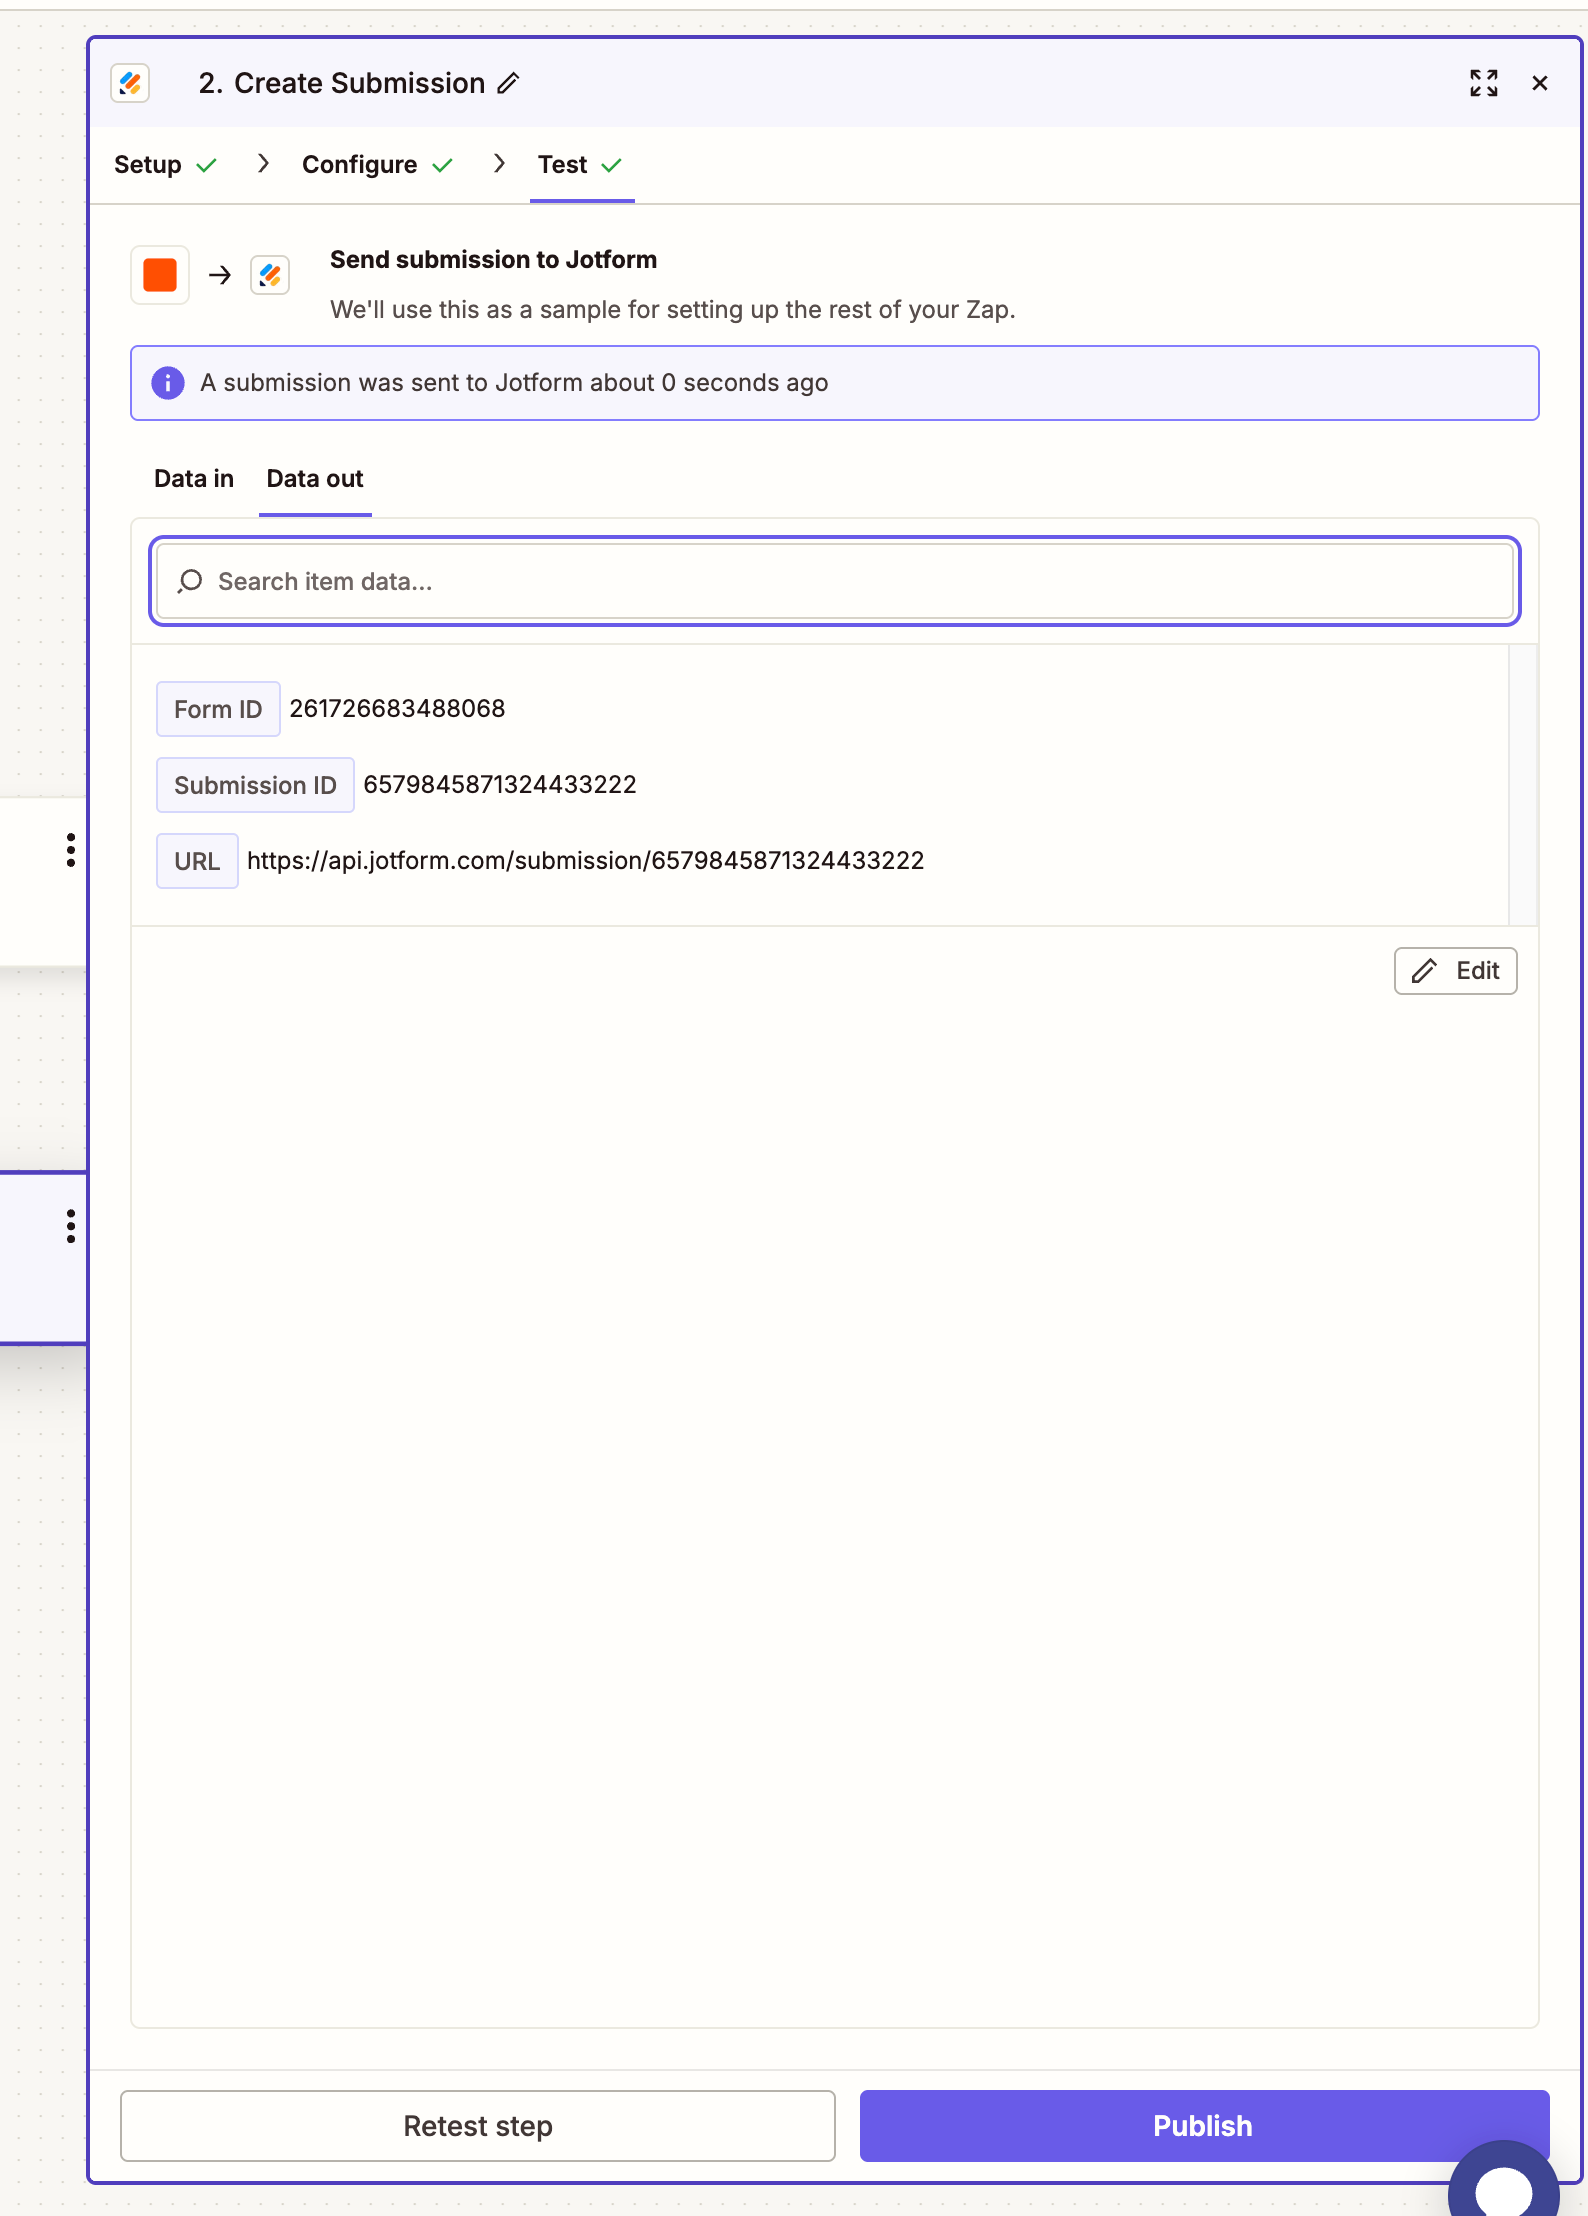
15. Test the submission
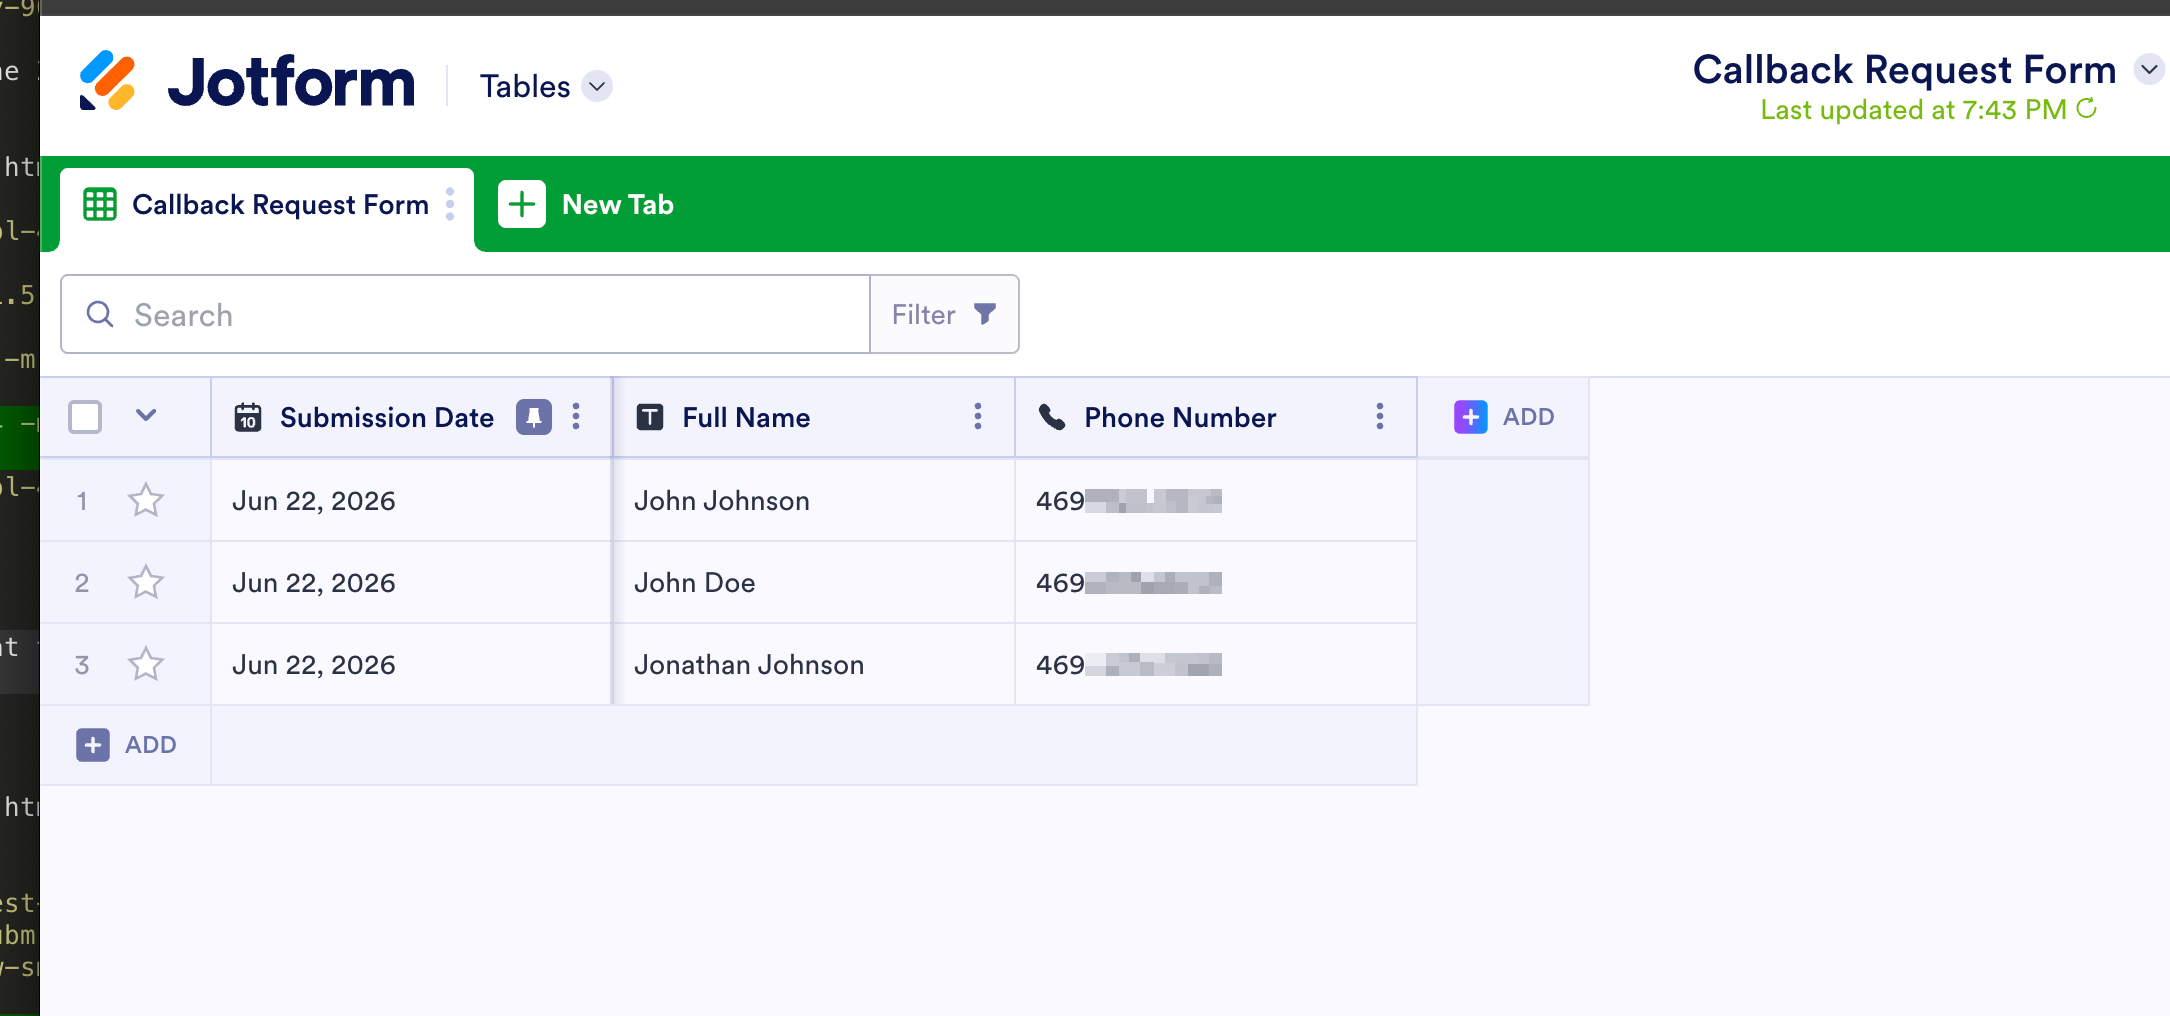
On the Test tab, run the test. Zapier sends a real submission to Jotform using the call data, and you'll see a success message with the new submission's Form ID, Submission ID, and a link. Open your Jotform form to confirm the entry landed.
16. Republish your Zap
Since you edited the Zap, click Publish once more to push the new version live. That's it, you're done. From now on, every time your Zinng agent finishes a call, a new submission is created in your Jotform form automatically. Open your form's submissions in Jotform and you'll see the entries coming in from your agent.
And that's it. Every call your AI agent handles now flows straight into Jotform. If you have any questions or run into anything, reach out, email [email protected] or use the chat widget on our site.
Troubleshooting
- The Zapier toggle is greyed out. The Zapier trigger and the Post Call Webhook add-on cannot both be enabled on the same agent. Turn off Post Call Webhook first, then enable Zapier.
- "Check connection" still says not connected. The connection only goes live once your Zap is built and turned on in Zapier. Generating the API key alone is not enough.
Ready to get started?
Set up your AI phone agent in minutes. No credit card required.
Try Zinng Free for 7 Days
About the Author
Timothy Bramlett
Co-Founder & CEO, Zinng
Timothy Bramlett is an American entrepreneur, software engineer, and product strategist. He is the founder of Zinng, an AI-powered phone agent platform that helps businesses never miss a customer call with intelligent call handling, real-time transcripts, and instant summaries.