
Update your profile, photo and phone number
Change your name, profile picture, email address or phone number from Profile Settings, and verify a new phone number with a text code.
You change your name, picture, email and phone number on the Profile Settings page. Your name and picture save together with Update; your email and phone number have their own steps.
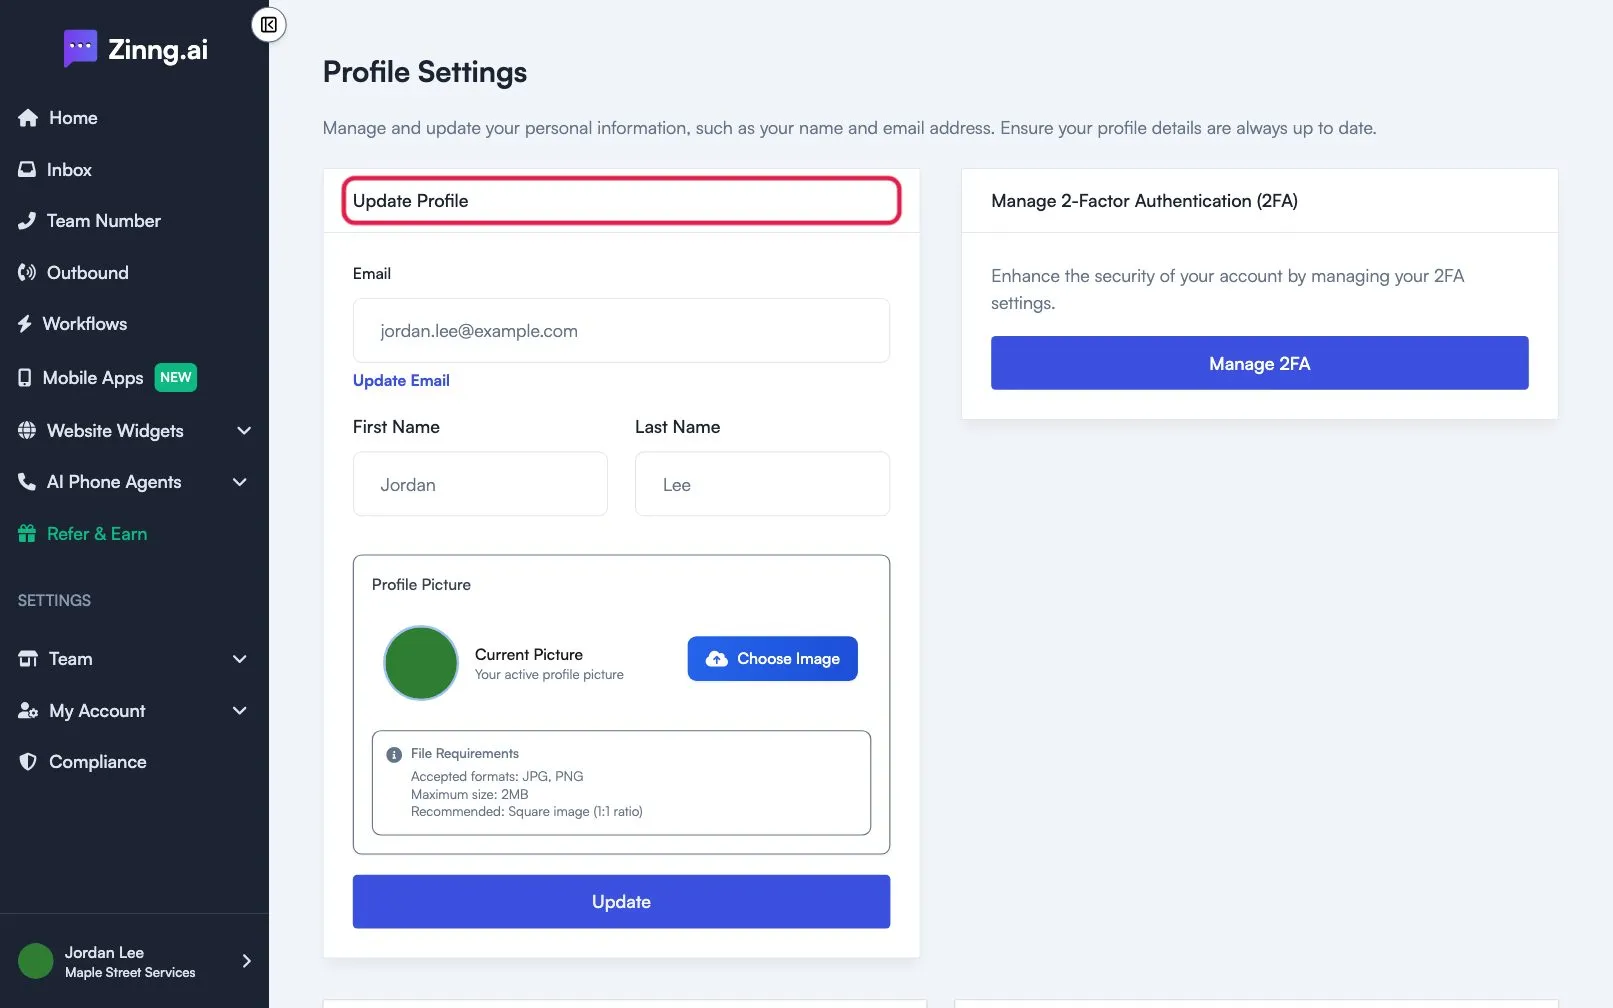
Change your name
Section titled “Change your name”- Open Profile Settings (see Profile settings).
- Edit First Name and Last Name.
- Select Update.
Change your profile picture
Section titled “Change your profile picture”- On Profile Settings, select Choose Image under Profile Picture.
- Pick a JPG or PNG file. It must be 2MB or smaller. A square image works best.
- Check the preview, then select Update.
Change your email address
Section titled “Change your email address”Your email is shown read-only on the profile form.
- Select Update Email under the email field. The Email Settings page opens.
- Under Add Another Email, enter the new address and select Add Email. We send a verification link to it.
- Open the link in that email to verify the address.
- Back on Email Settings, choose the new address and select Make Primary.
Other buttons on that page are Re-send Verification and Remove.
Add or change your phone number
Section titled “Add or change your phone number”- On Profile Settings, find the Phone Number card.
- Select Add phone number, or Change number if one is already verified.
- Enter your number and select Send Code.
- Enter the code from the text message under Enter Verification Code.
A verified number shows a Verified label. You need a verified number to use text-message two-factor authentication.